
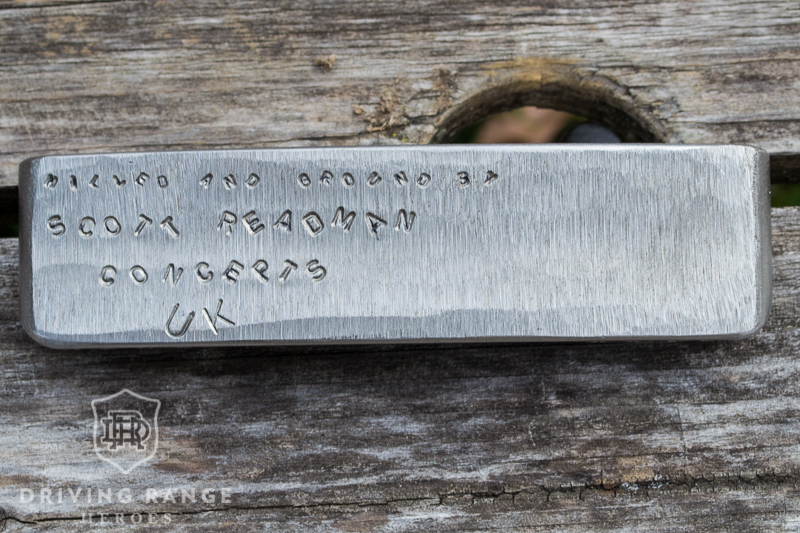
Scott Readman Concepts Collaboration Background
When the Scott Readman Concepts IKB putters were in the design phase, Scott showed me the CAD drawings and I immediately loved the #2 shape. I told him, “I want the very first one out of the box. That’s mine!” True to his word, when the heads finally came in, Scott pulled the first one and got to work stamping up my new putter.
Well, shortly thereafter, Scott decided he wasn’t happy with the sole and wanted to start over. So Scott scrapped that putter and made me a different putter instead. In the meantime, Scott came up with a solution for the sole and put it aside for a rainy day. The end result is the putter you see in this post. I had the pleasure of literally working side-by-side with Scott in his shop in England and finished the putter back home in Chicago.
WARNING: this is a long, picture-heavy post. The slideshow at the bottom will have a ton of pictures in it.
The Start
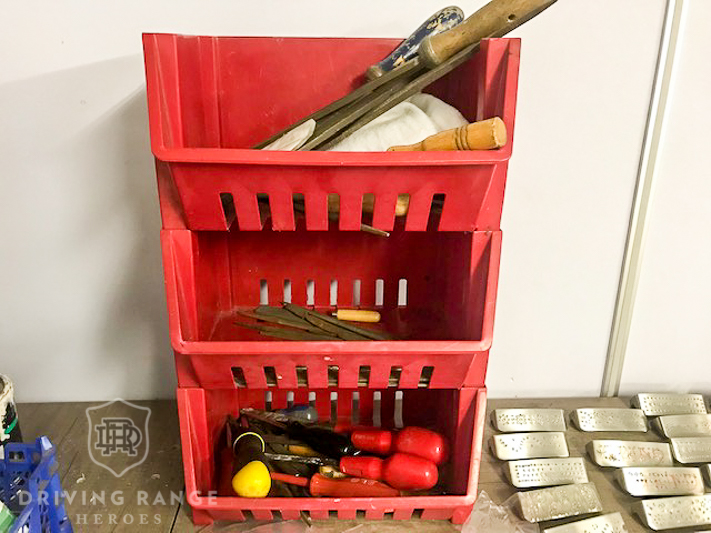
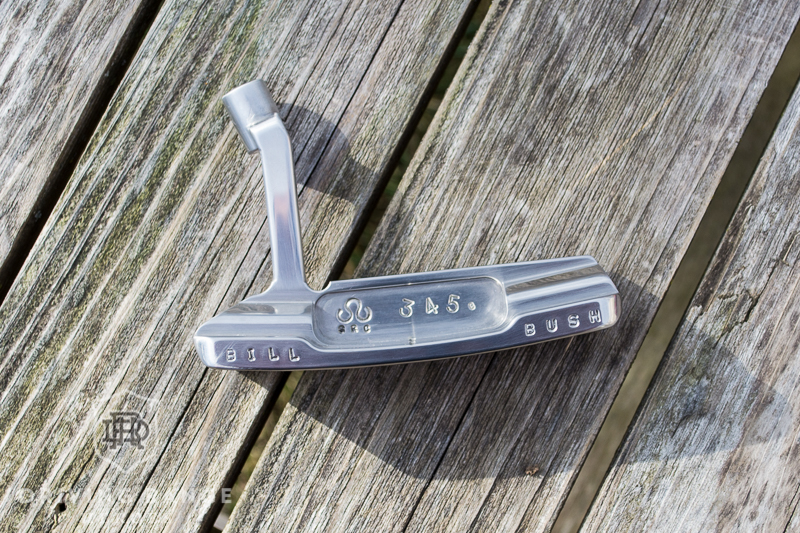
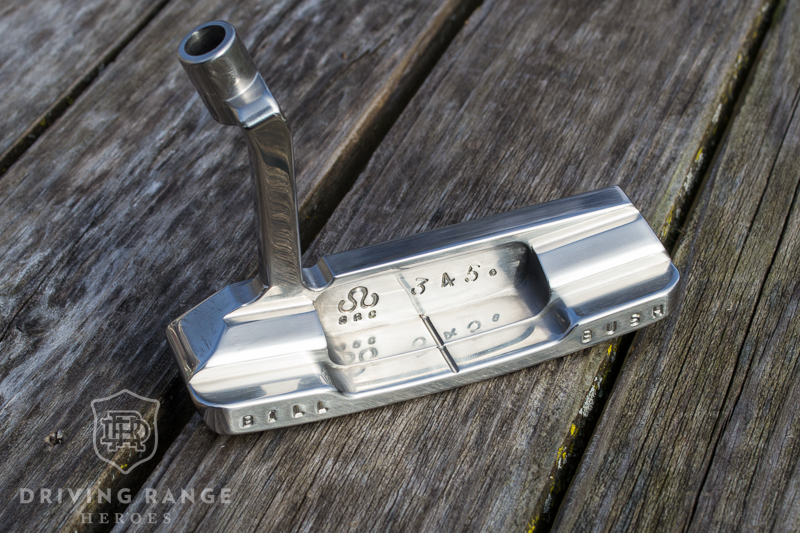
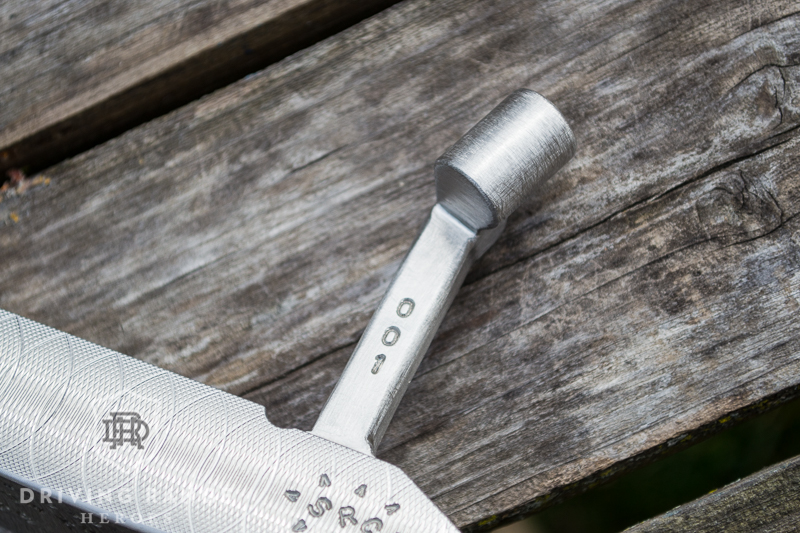
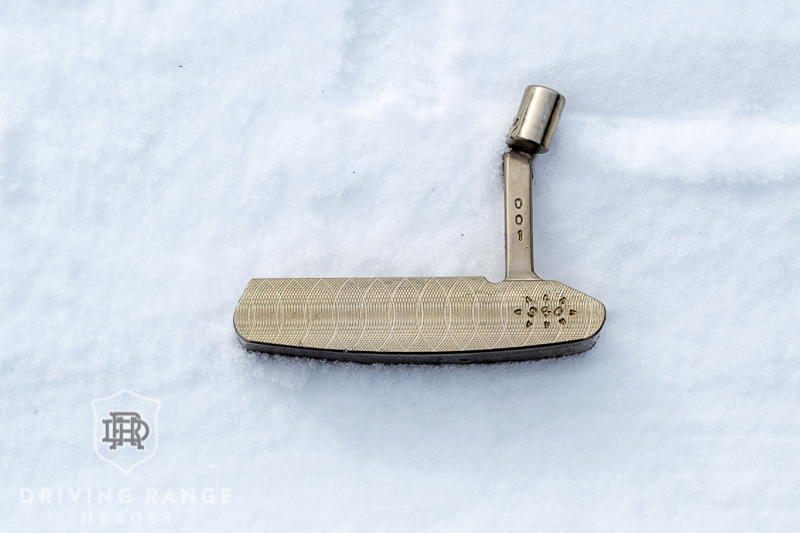
When Scott Readman first receives the putter heads, they look like the picture above. They’re free from any markings and are essentially just rough cuts of a putter head straight off the mill with minimal “finishing.” As you can see, there are a lot of mill marks and sharp edges to work out. Scott would typically then take the head and start stamping out a design. Once Scott is done with stamping, he “dresses out” any imperfections from the stamping, then goes to work on any of the mill marks he wants to clean up.
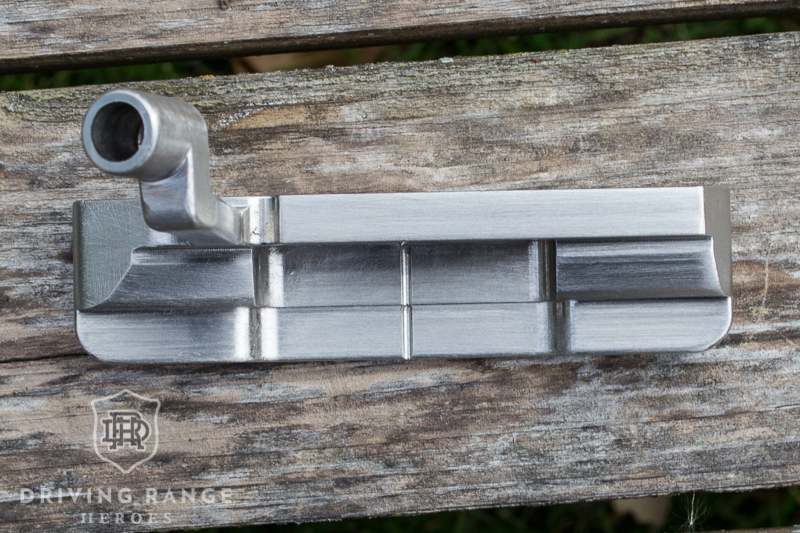
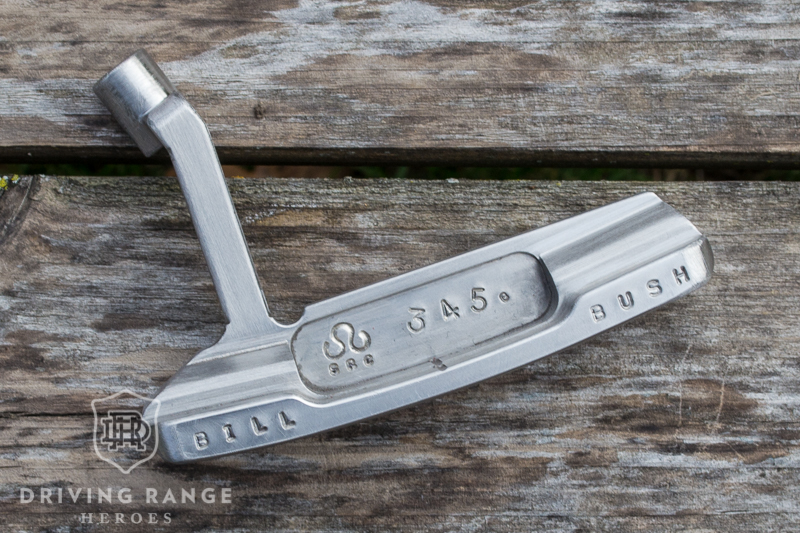
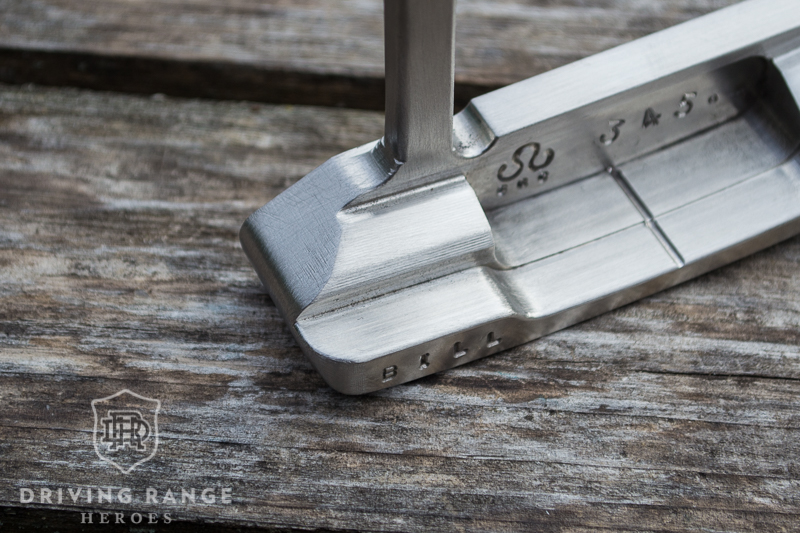
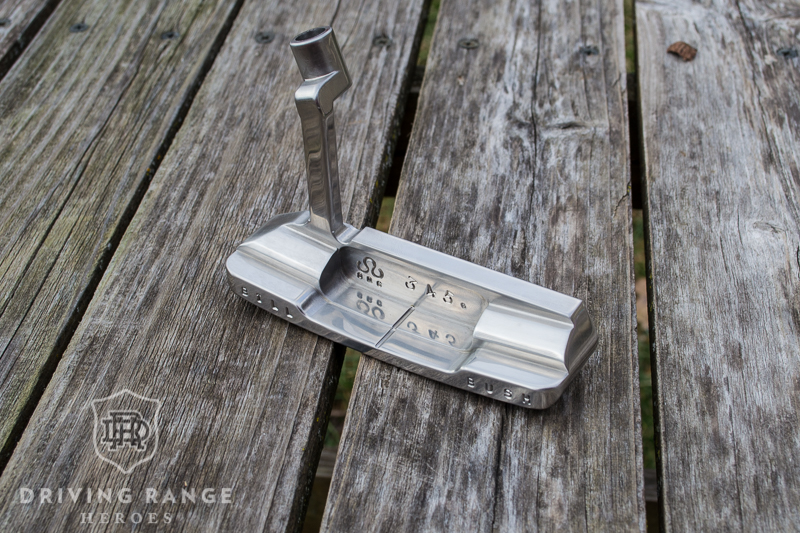
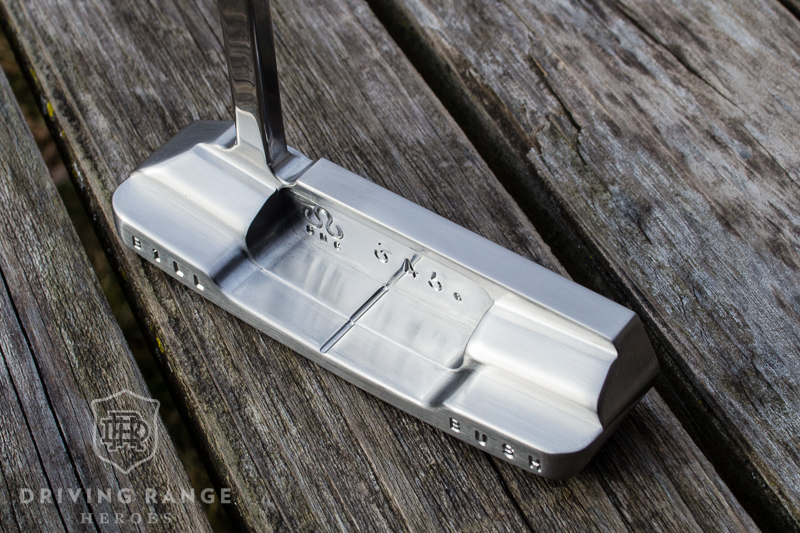
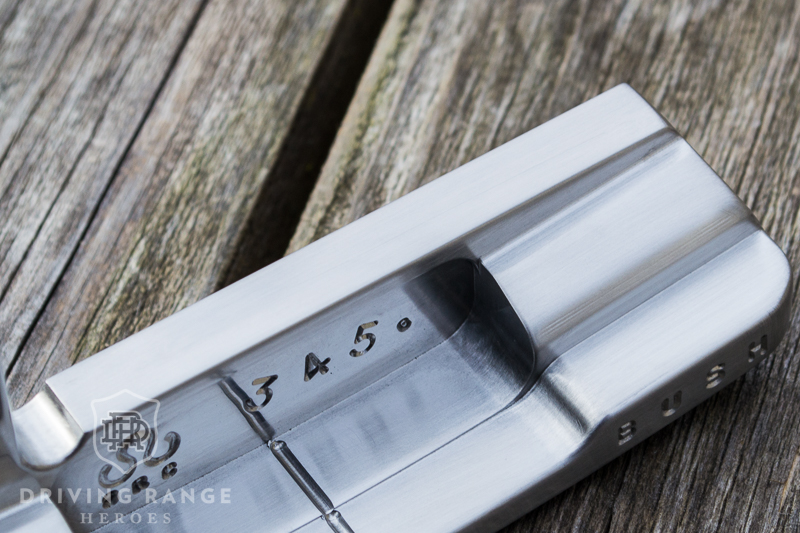
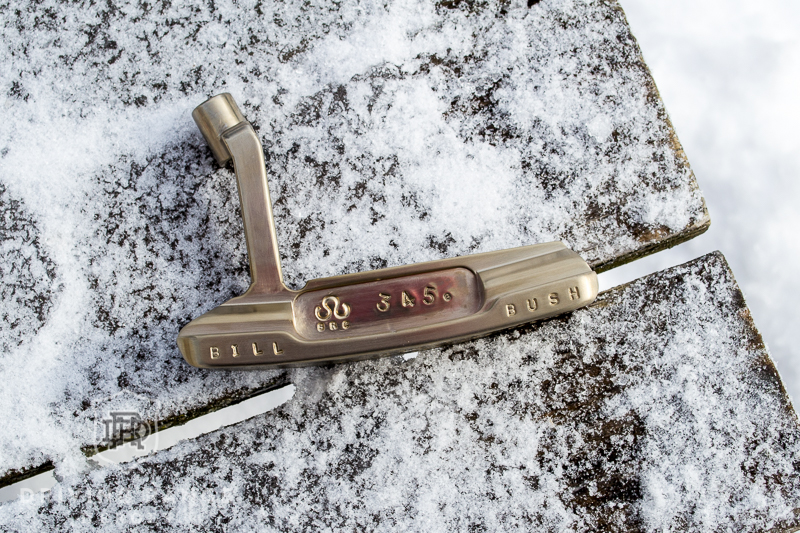
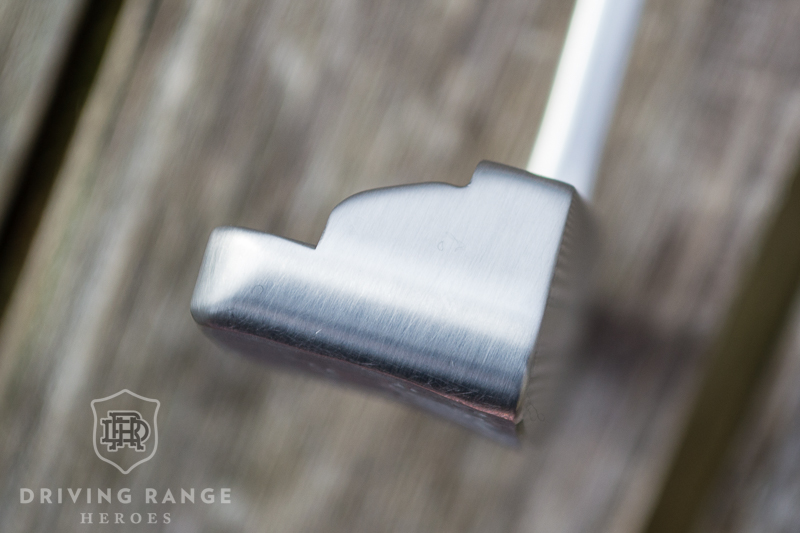
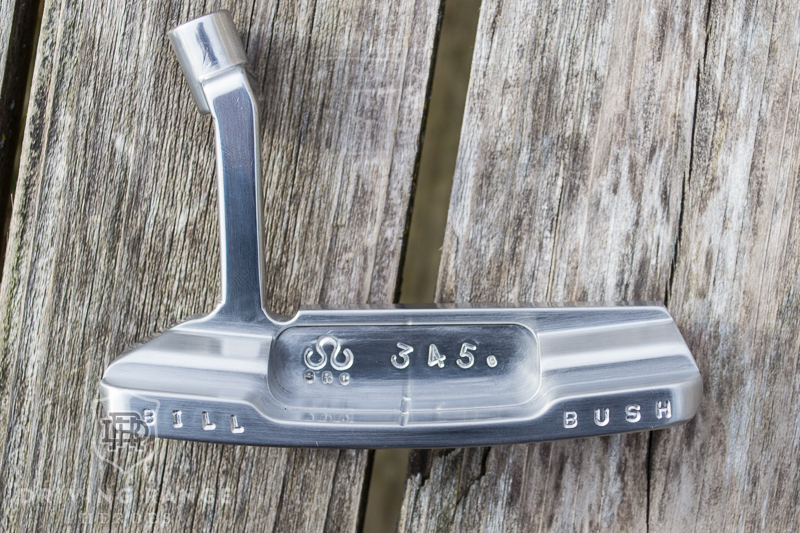
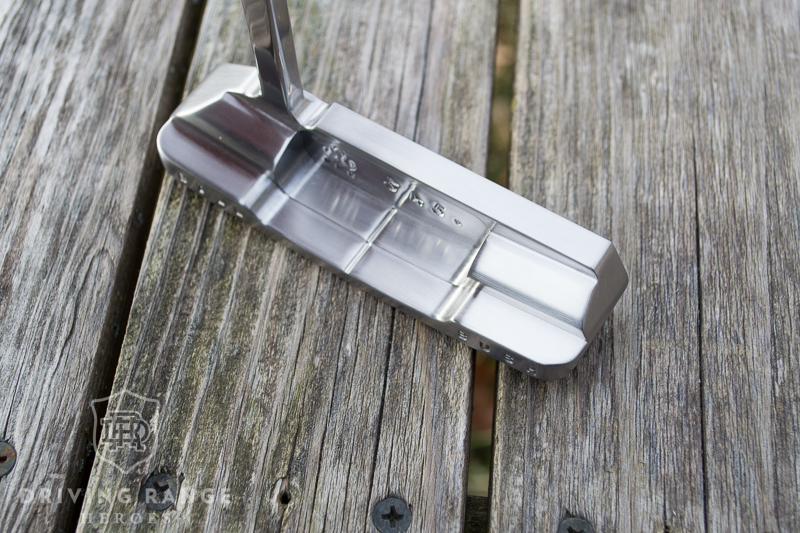
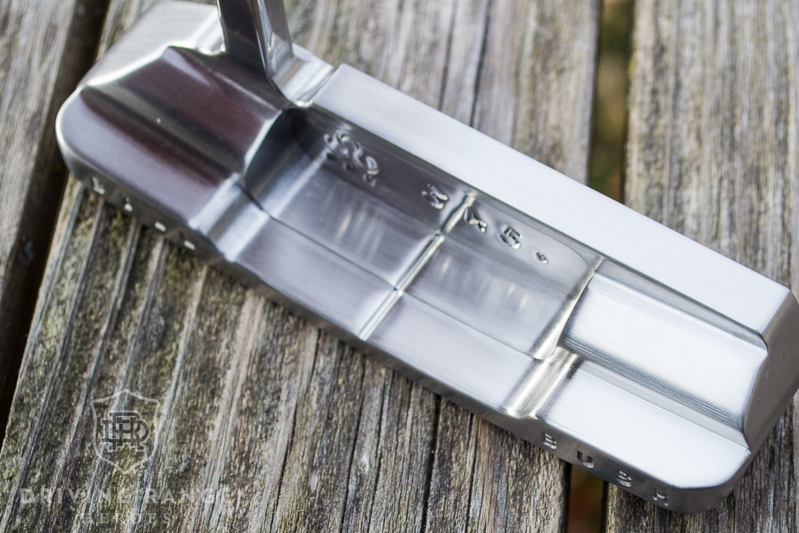
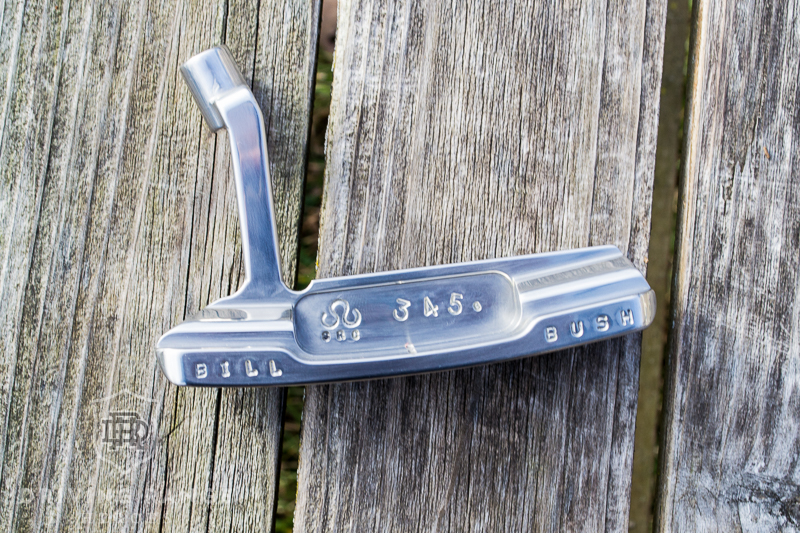
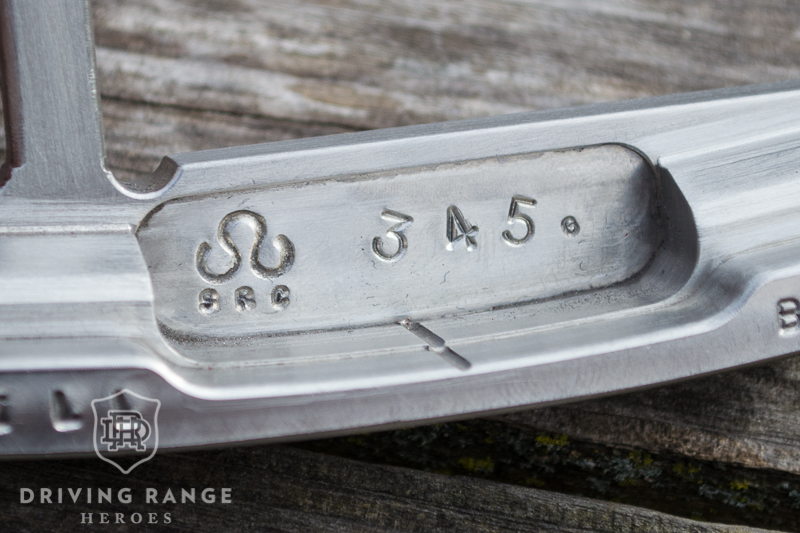
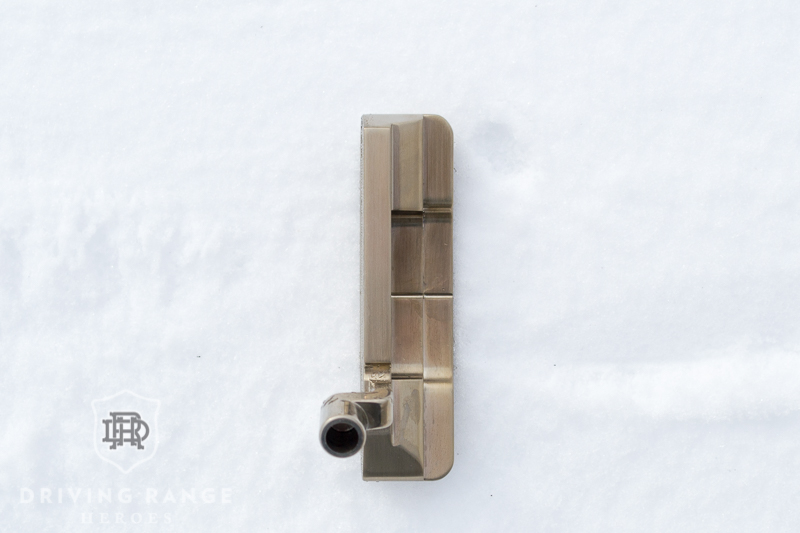
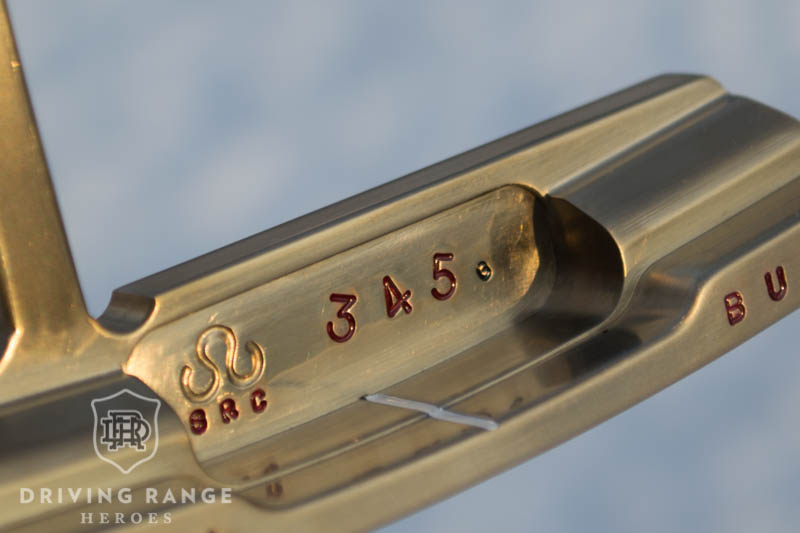
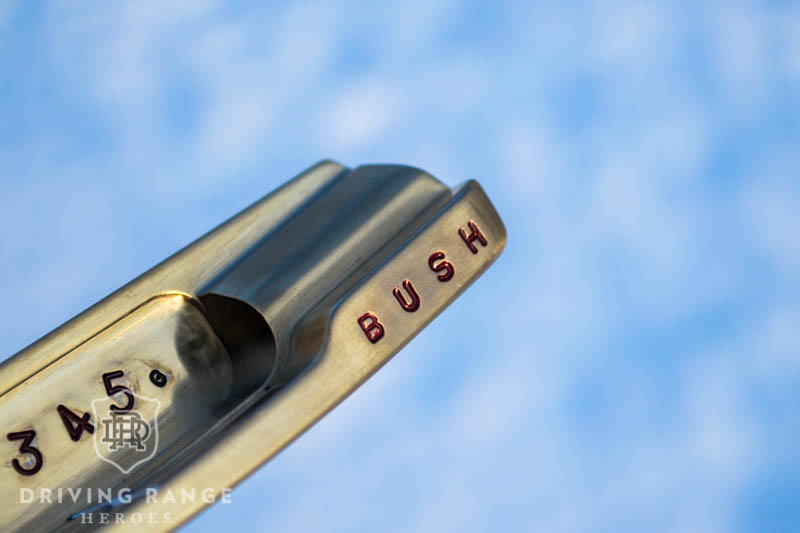
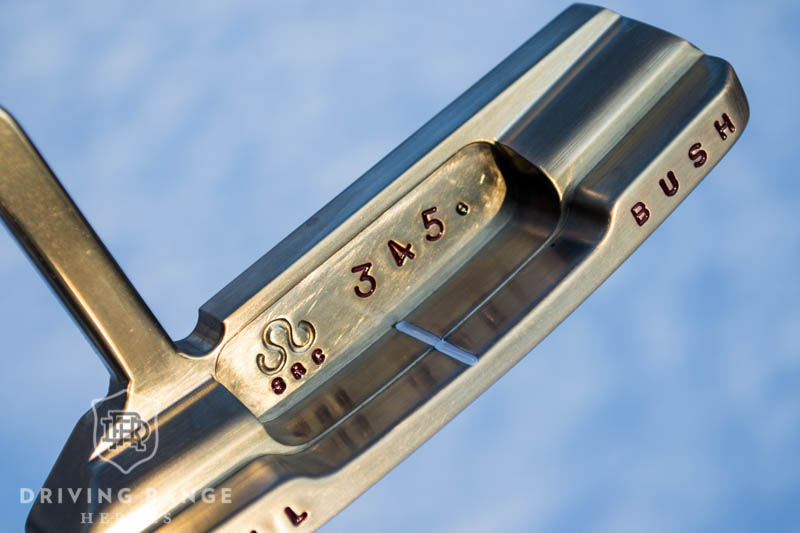
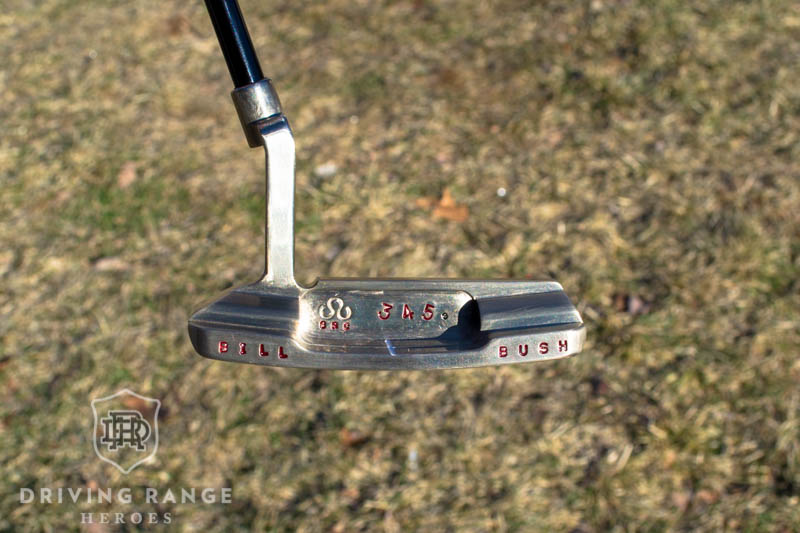
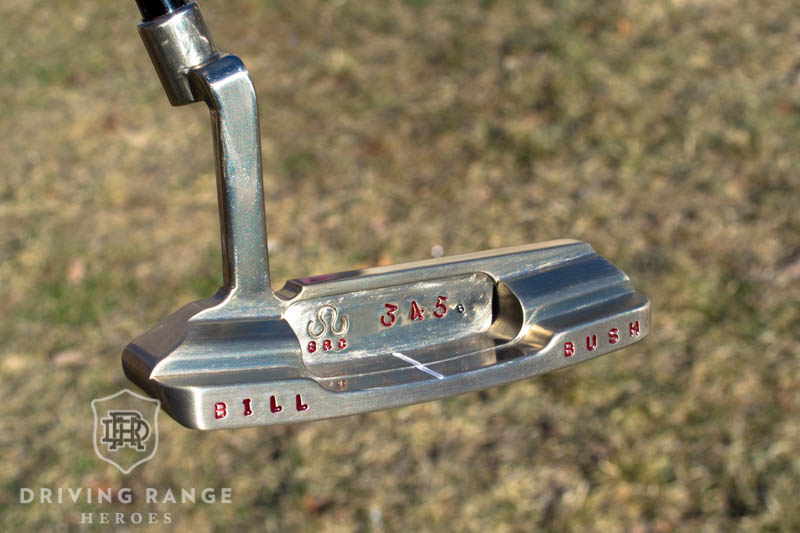
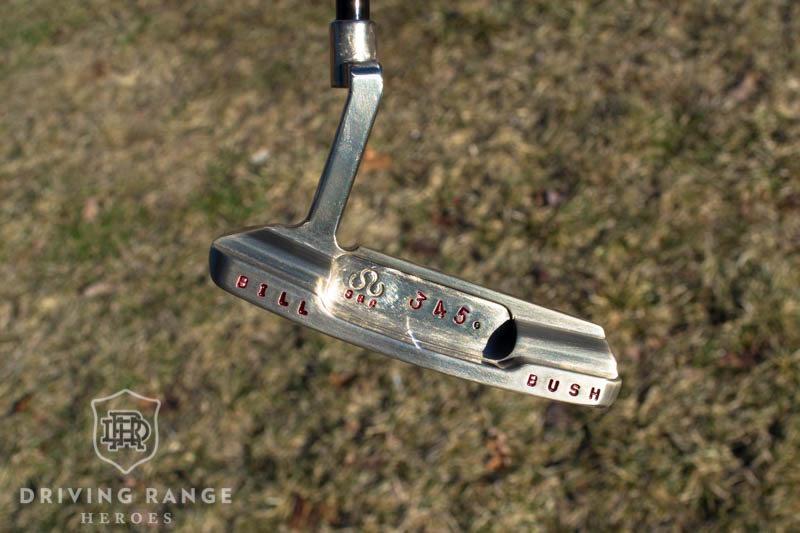
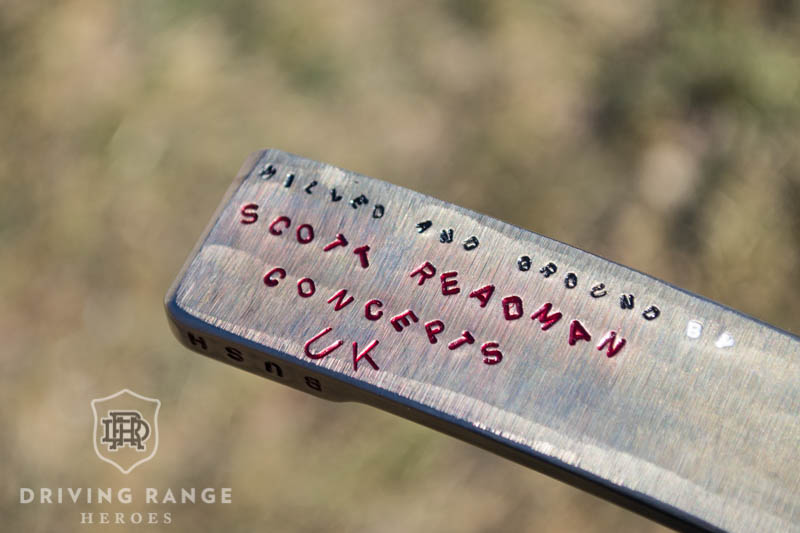
In the case of this putter, during stamp dressing, Scott concluded the sole wouldn’t work. Scott Readman cleverly found a way to salvage the putter in true “boutique” fashion. He ended up hand-grinding a cool rough almost “bullet sole.” True, this took some weight off, but the putter still came in at 345 grams and setup absolutely perfect when soled on the ground. Knowing I was due to show up at SRC HQ in a few weeks, Scott stopped working on the putter. He waited for me to show up and let me decide on next steps with him. The decision we came to was that I would take this raw putter that Scott had “only” stamped up and ground, then finish the project myself. This meant softening edges, removing mill marks, etc. My job was to turn this putter into a finished piece of work.
Initial Filing & Sanding
Refinishing a dinged up club you picked up from the used bin is one thing. Getting a putter that was never even finished in the first place is another. In some cases, you may want to keep that rough, industrial-milled look in your finished product, but we agreed I should try to go with a more finished look. We discussed different things to do to the putter, specific areas that needed special attention, and how to get started. Ultimately, all of the work would be done by hand. I will be the first to admit that I’m not a machine and the final product definitely has a hand-finished look.
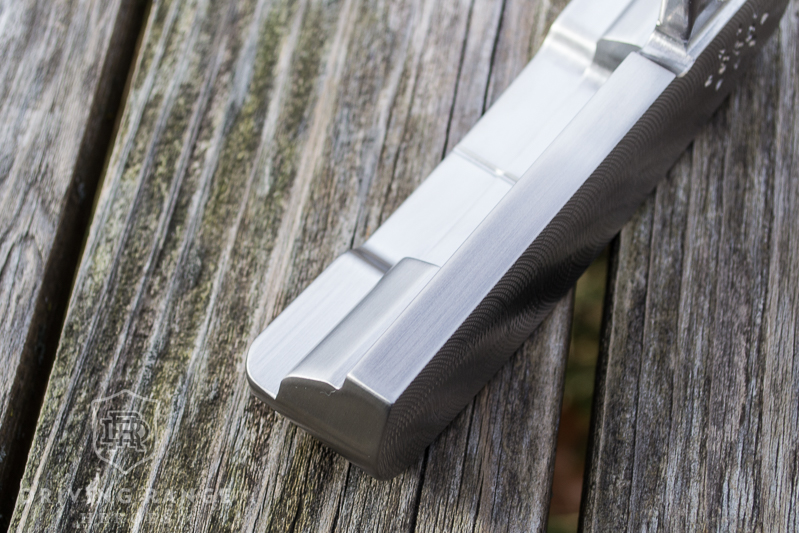
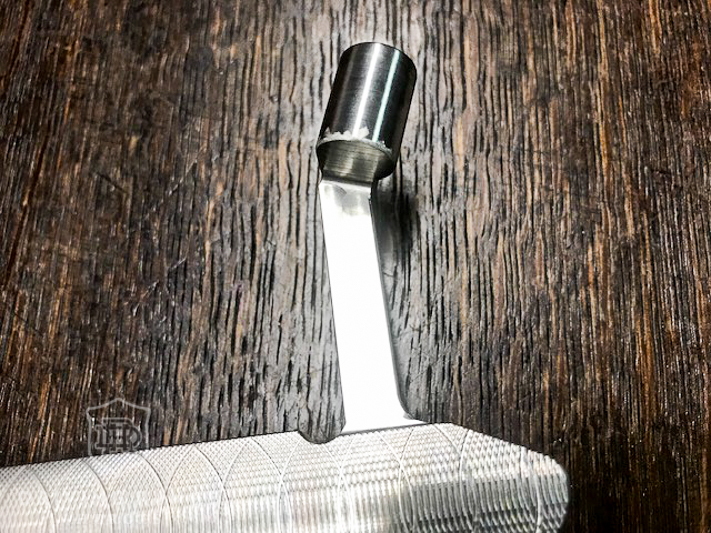
I figured while I was at Scott’s shop, he had all of the tools I needed so I better get to work. Even more importantly, I had an expert available to help me with anything – like fixing mistakes. To make good use of my time, I got to work filing edges into a softer shape and sanding marks out. With various files, I softened edges such as the neck, topline, and bumpers to smooth out the flow a little.
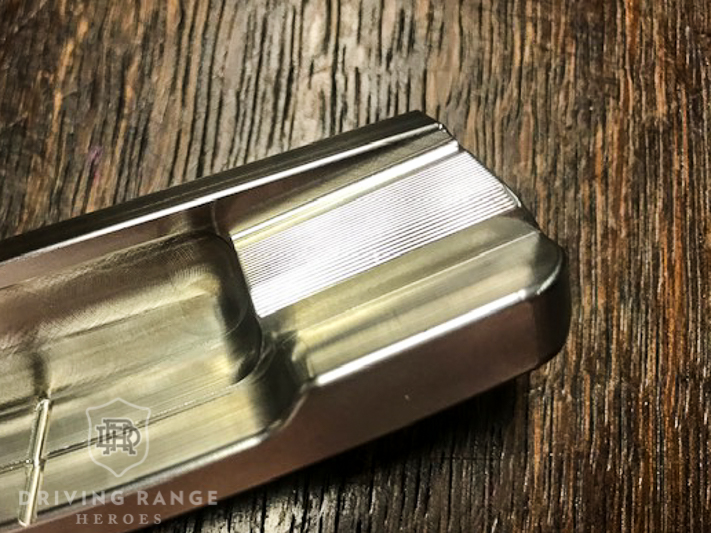
I used a seriously low grit sandpaper to really chew into the raw metal. This was the first phase to remove all of the various milling marks. I stole a chunk of the sandpaper to finish that phase when I got home, and this is what the putter looked like when I was done with that phase.
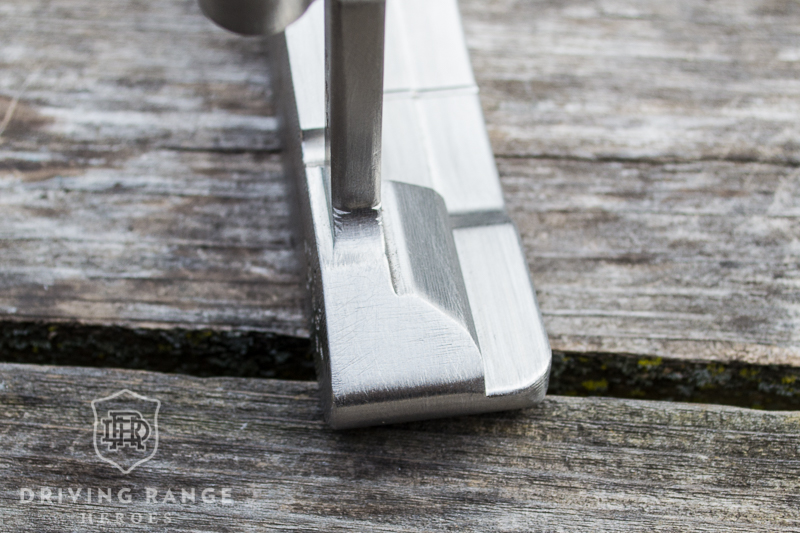
 You will notice the putter is still pretty rough and messy. There are some pretty deep grooves in the heel that I couldn’t work out by hand. As the project continued, I made steps to clean it up quite a bit, but you can see some remains of this work.
Finishing Sanding
Rather than show you minimal updates from each phase of sanding, I’ll just speak to the process and show you the final product of this phase. Once I finished that really rough first phase, I thoroughly sanded the putter using 100, 220, and 400 grit sandpaper. This phase was key because it started to clean up the putter quite a bit, but the sandpaper was still rough enough to sand the rest of the milling lines. It’s important to make sure you work out all of your major imperfections during this time. Frankly, by the time you hit 220 grit, you should just be blending.
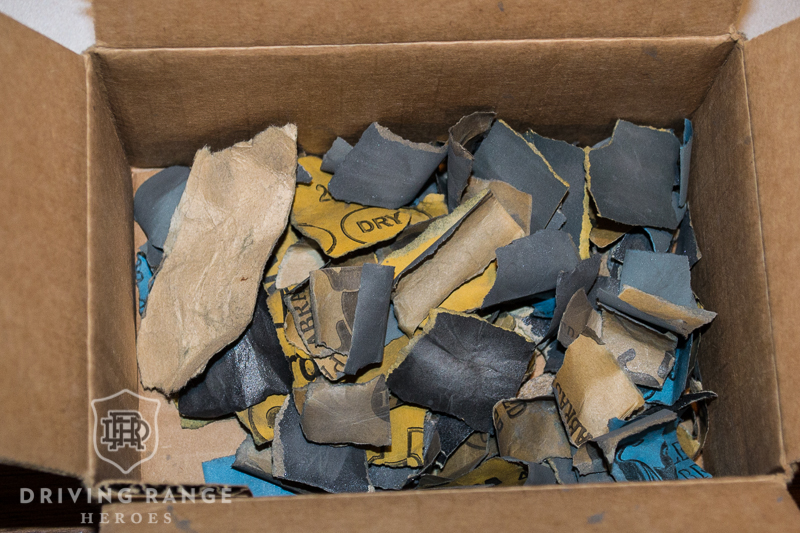
Next I moved onto wet sanding. I wet sanded the putter from this point forward using 400, 600, 800, 1000, 1200, 1500, 2000, 2500, and 3000 grit sandpaper. Note: you will go through a lot of sandpaper. I will point out, you need to take your time and do it right. Don’t rush to get through the project. Take your time and make sure you get the finish you’re looking for. If you go as far as I did, the putter will have a nice shine to it.
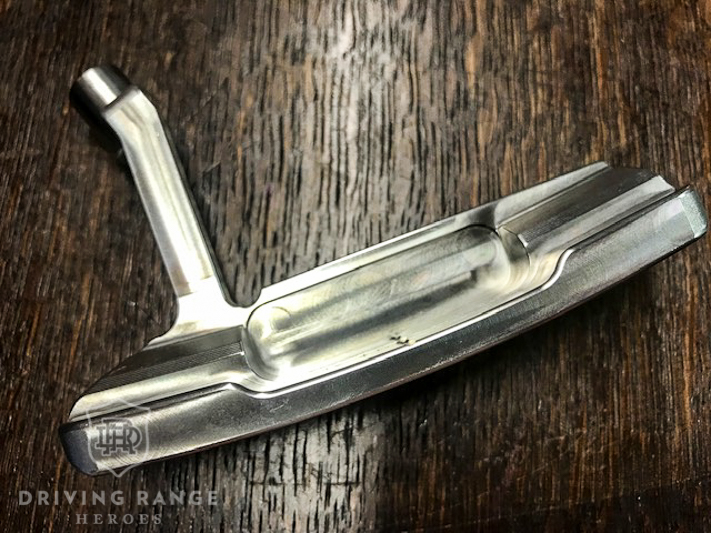
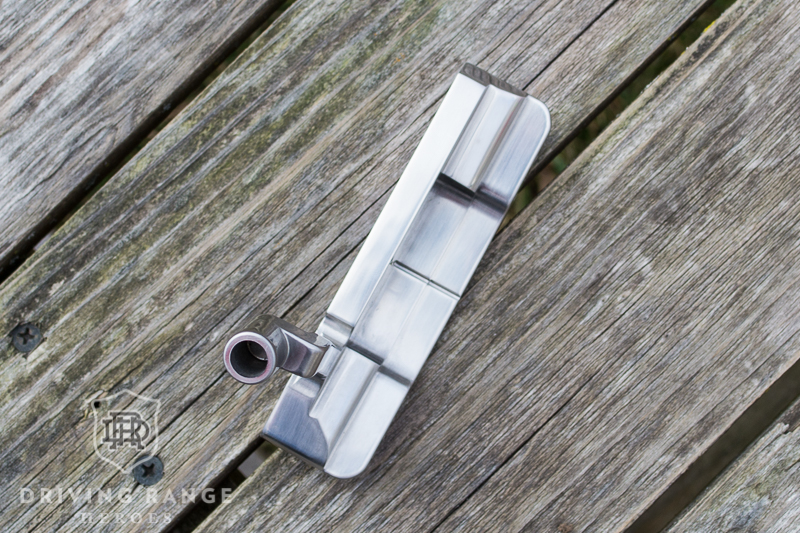
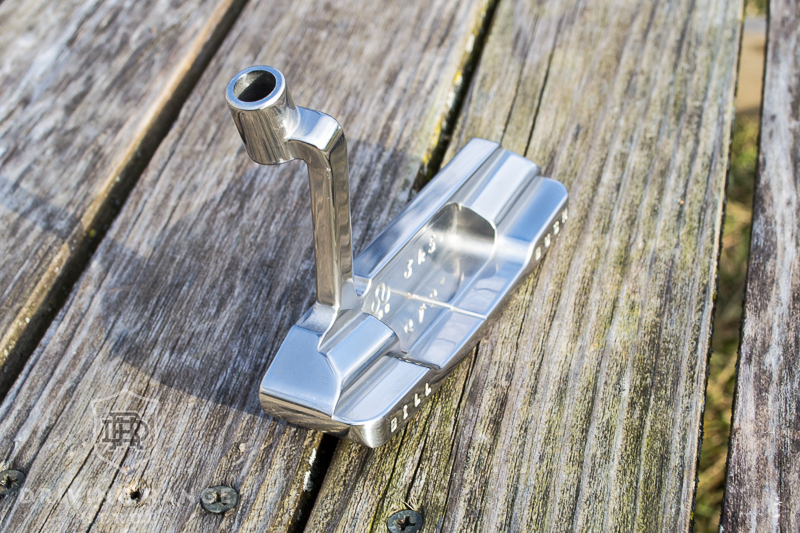
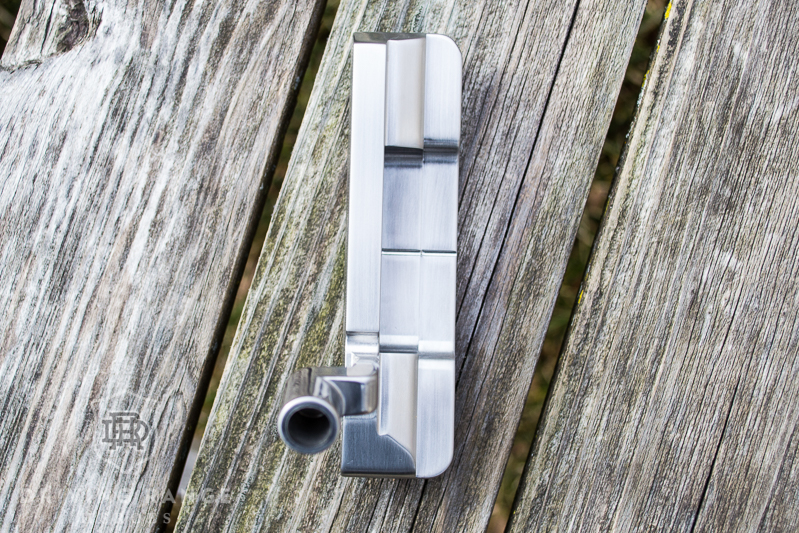
This is what the putter looked like following all the sanding. The metal almost had a squeak to it when you touched it.

Polishing
Now, in my effort to get a super clean canvas for an even and well-prepped finish, I decided to do a light polish as well. All I did was give the sanded putter a quick Brasso treatment. I just used old t-shirt scraps and followed the instructions on the bottle. The polished putter came out great, but I’ll later mention where I think this cost me a bit in my finished product. I think I could have even left it as is at this point if I really wanted to.
“Brushing”
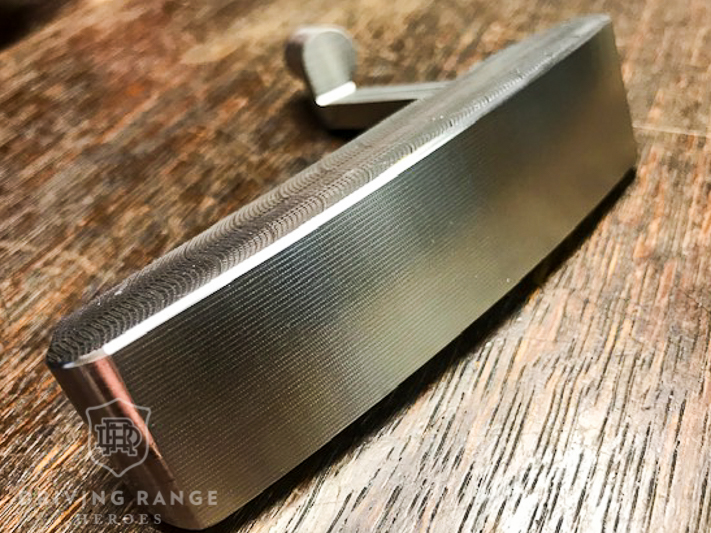
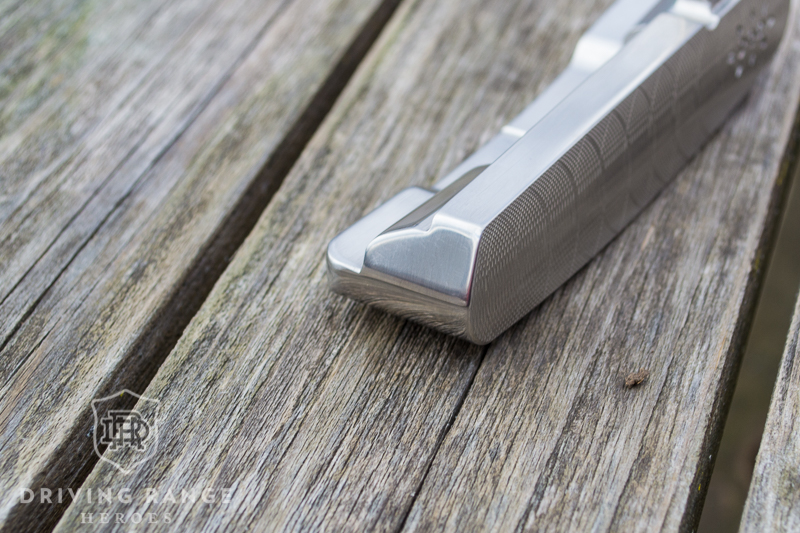
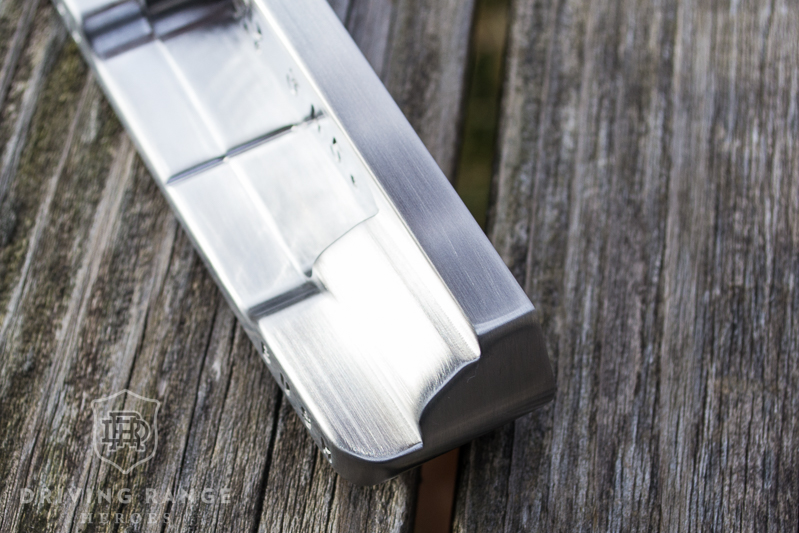
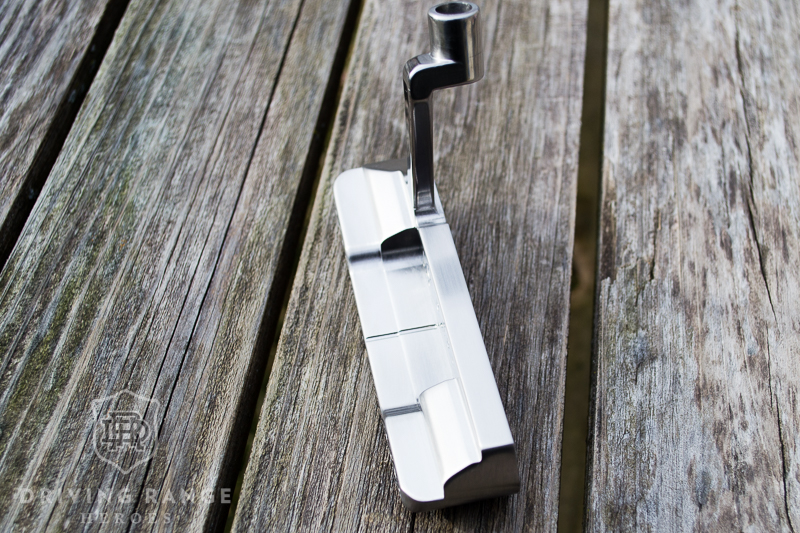
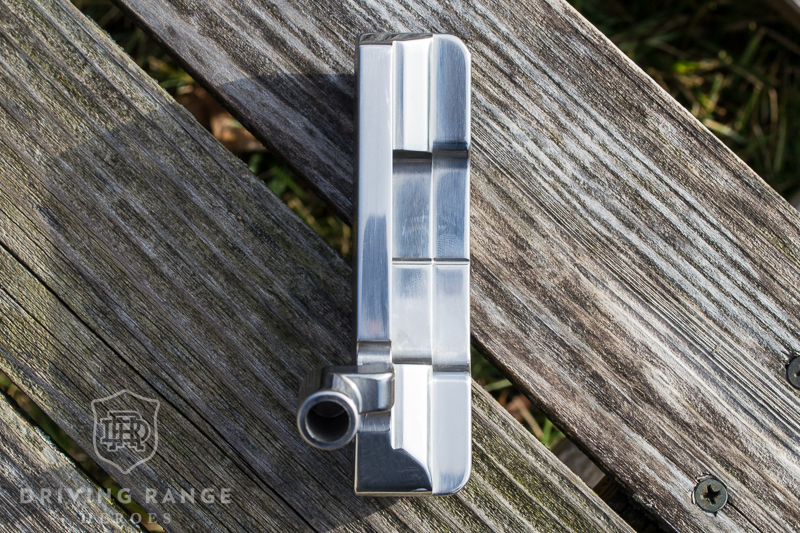
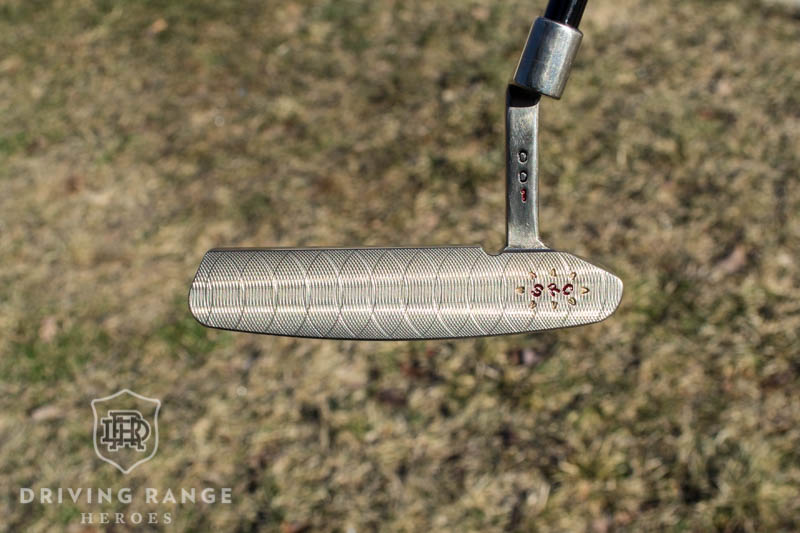
I knew immediately I wanted a brushed finish on this Scott Readman original. I’ve done brushed finishes by hand in a “DIY fashion” before, but never on a “brand new putter.” Here’s where I think I shot myself in the foot by getting the IKB2 so squeaky-clean polished. Typically, you just get the putter to a nice even, smooth finish and then you can get that brushed finish by using a green Scotch Brite pad. Well, this time it was like the metal was so smooth that the Scotch Brite couldn’t make enough friction to brush the metal. I suppose I could have tried different color pads, but didn’t feel like going to buy more. As a test, I took 800-grit sandpaper to see if it would brush the steel. There was some change, but hardly the look I was looking for. It was still too shiny.
I ended up working my way back down to dry 220 grit and made uniform strokes to get this brushed look. (There are a lot more brushed photos in the slideshow at the end if you want to get a better look.)
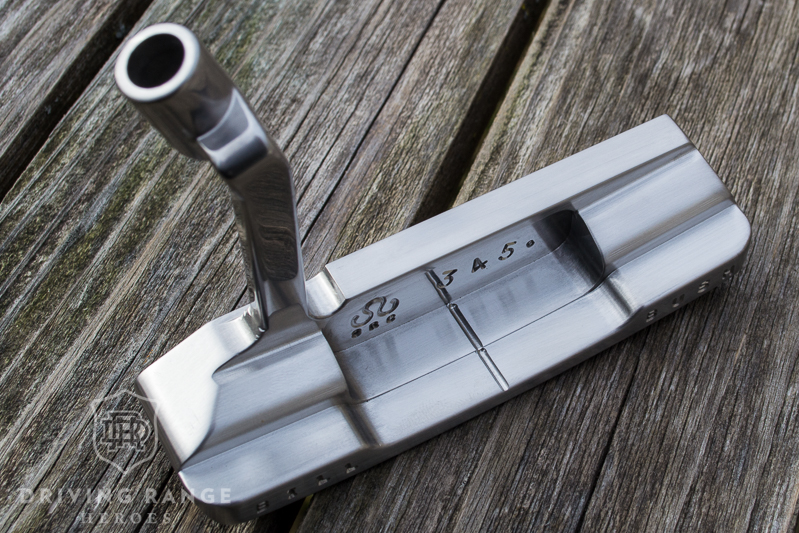
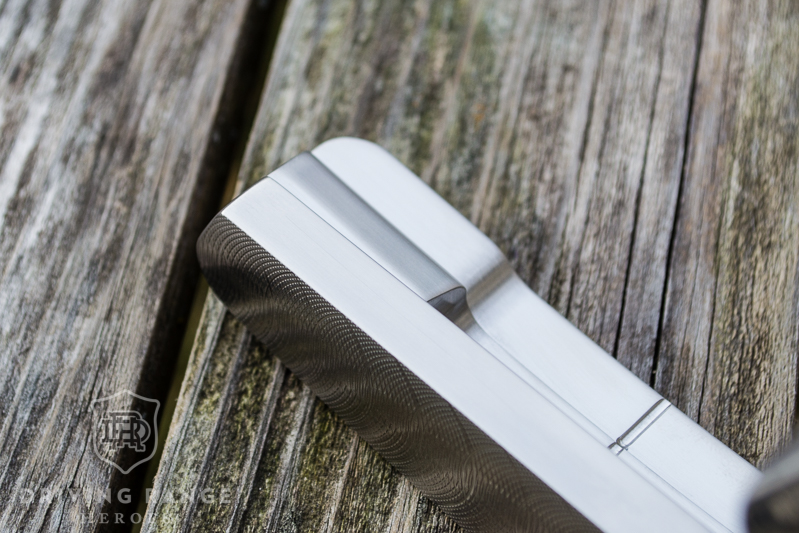
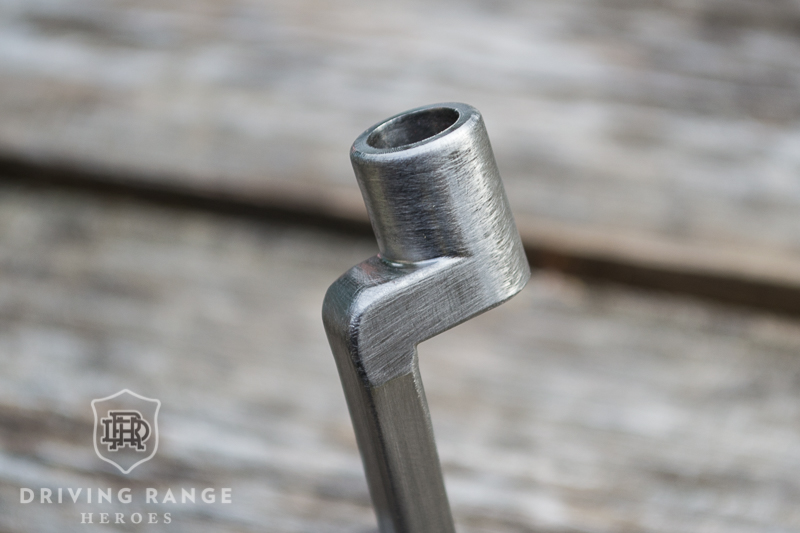
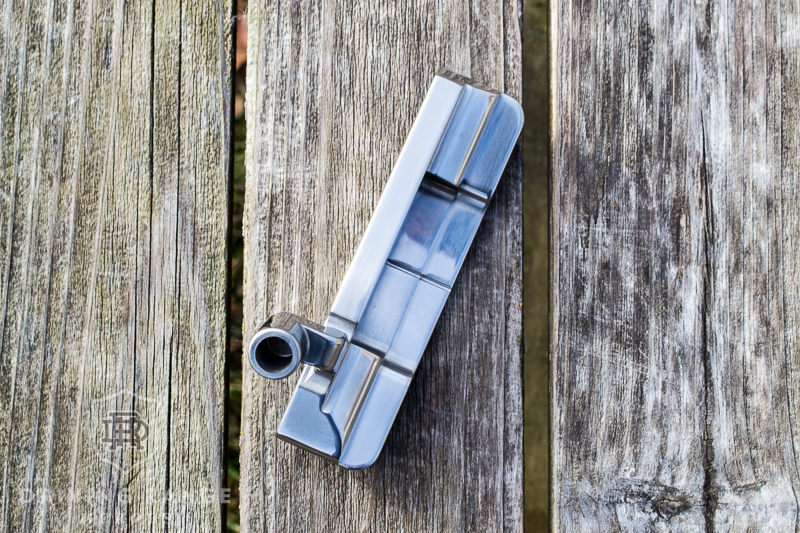
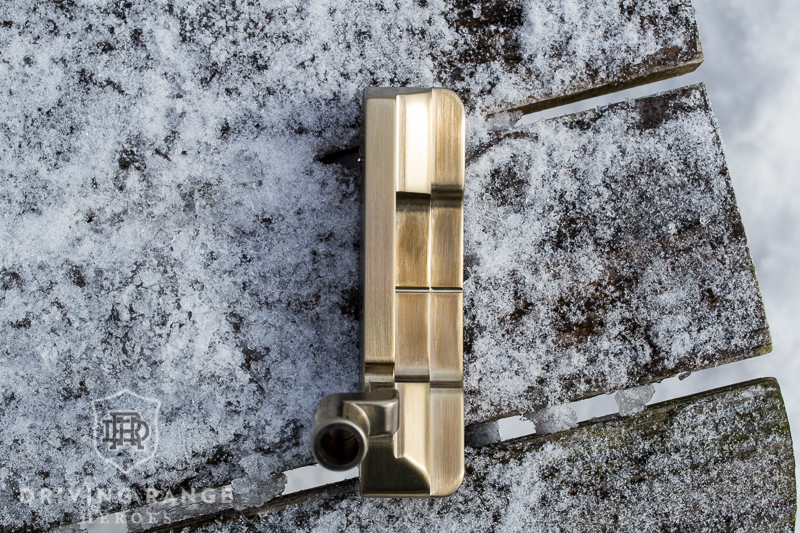
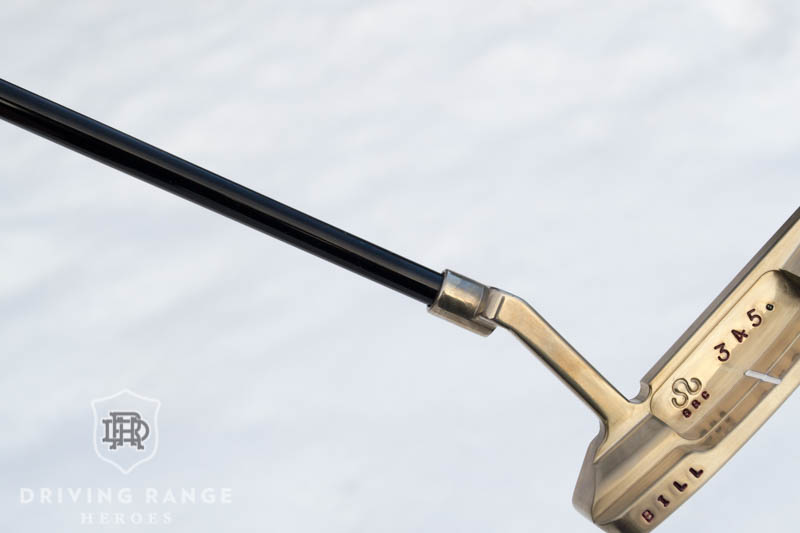
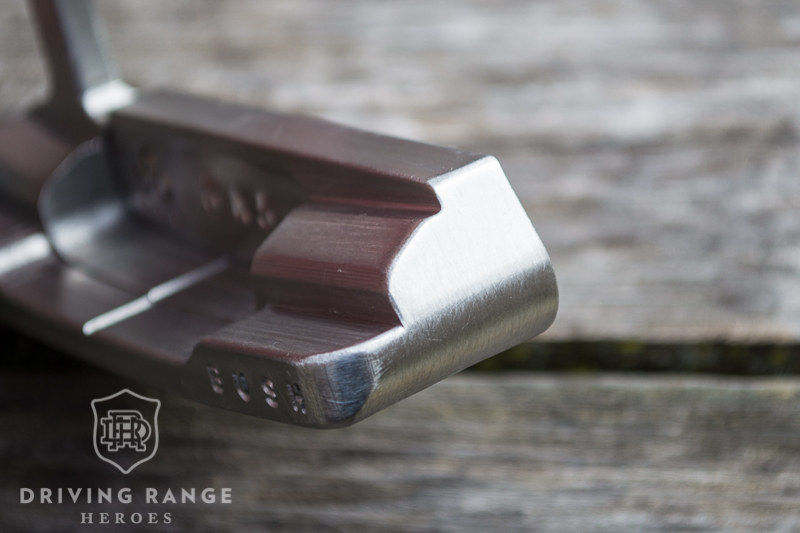
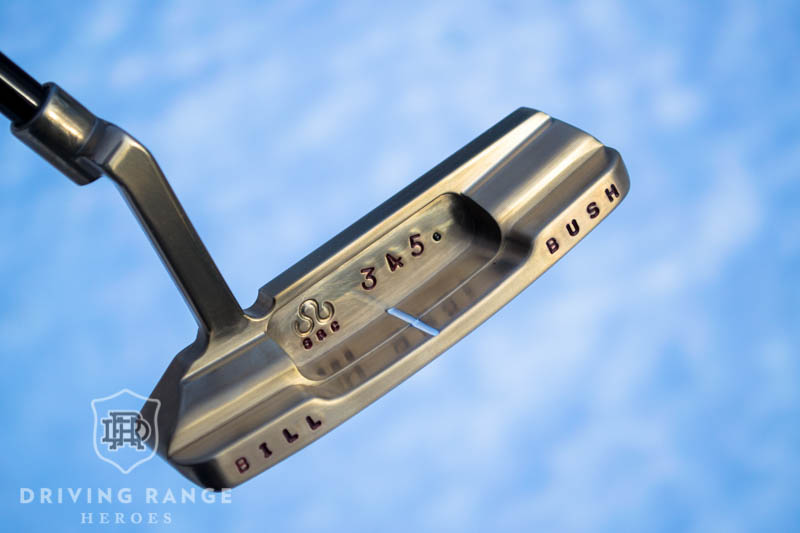
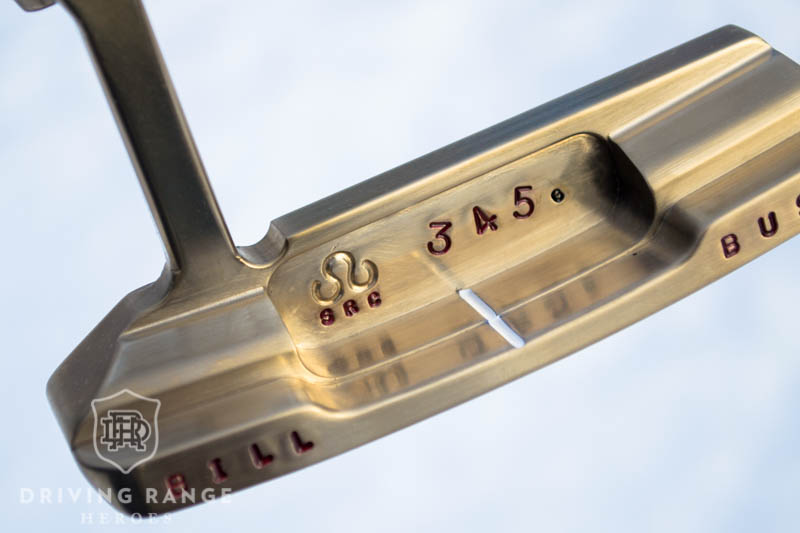
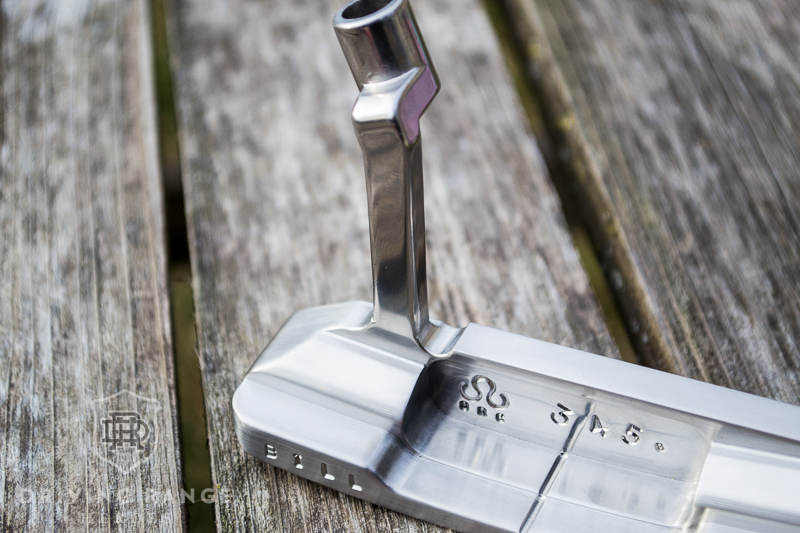 You can see that a lot of the glare is gone, but the putter still has some shine to it. Also, I specifically left the neck and hosel polished just to give it a little different look. Truth be told, if it wasn’t Winter, I would have considered trying to do a media blast outside, but I just didn’t want that matte look. All in all, I was happy with this finish and decided to proceed to the next major step – torching.
Torching
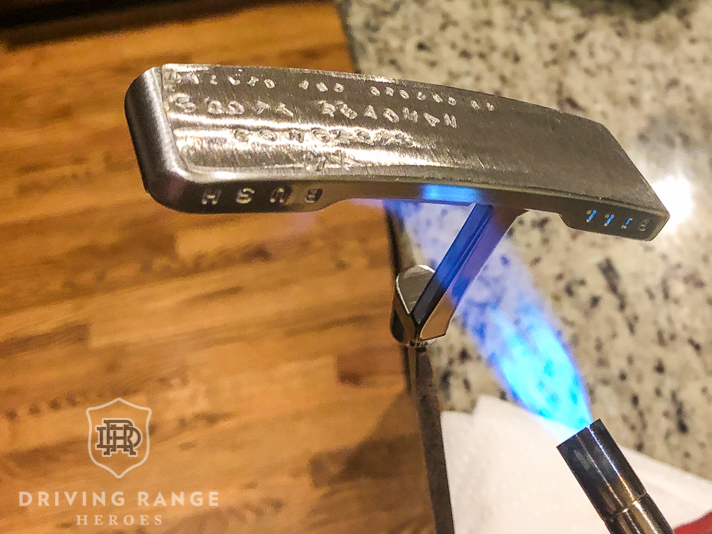
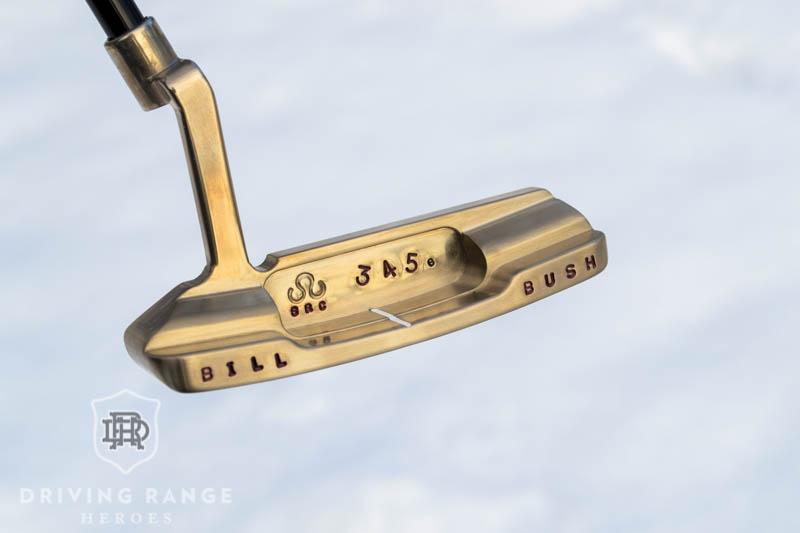
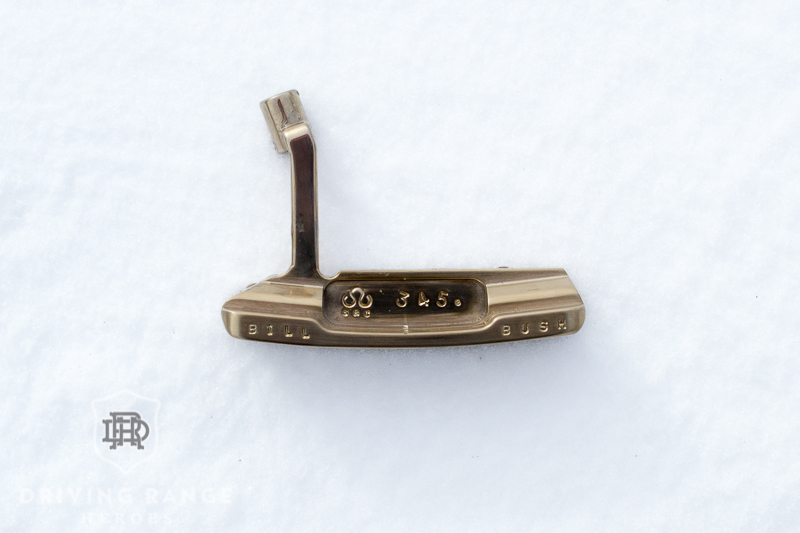
I’ve talked about torching a Scott Readman putter for years. The problem is, I get too sentimental and never want to alter these wonderful putters Scott’s made for me. This project was the perfect opportunity to finally do it. I’ll save the explanation of the torching for another post, but due to weather constraints, I rigged up a stand in my kitchen to torch this putter. It was tough, and somewhat nerve-racking, because the poor light made it difficult to see how the color was changing as I torched. Thankfully I got it right and loved the end result.
Pro tip: this is why it’s important to do a good job with your prep work. When you torch your putter, any misses or mistakes will really come out.
Finishing Touches
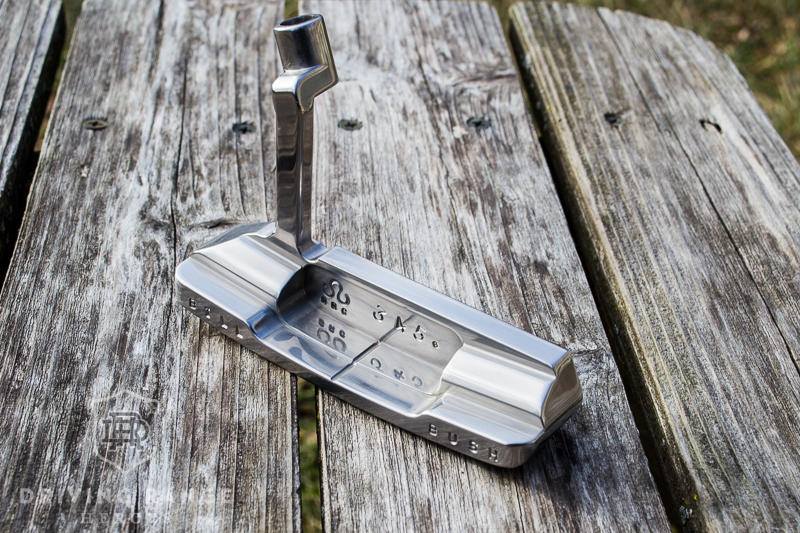
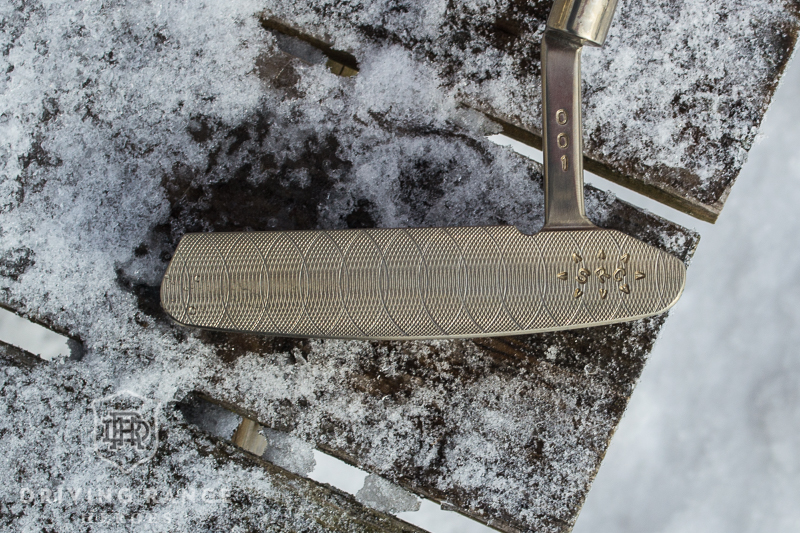
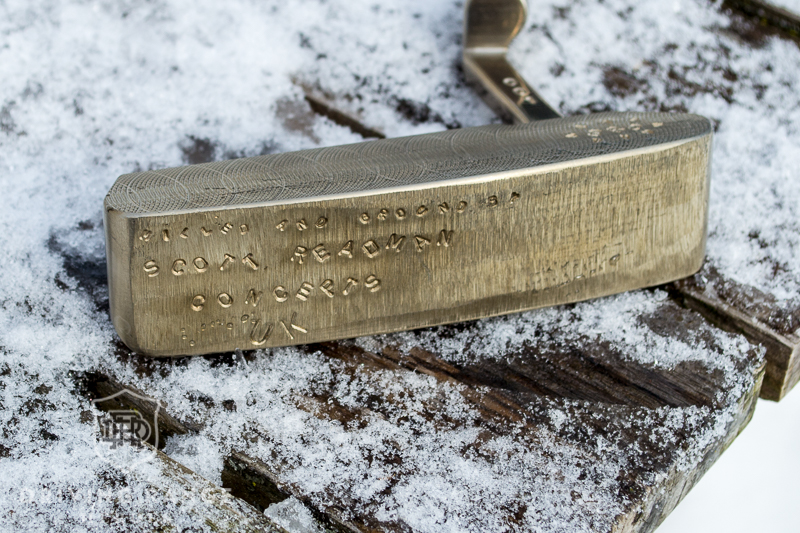
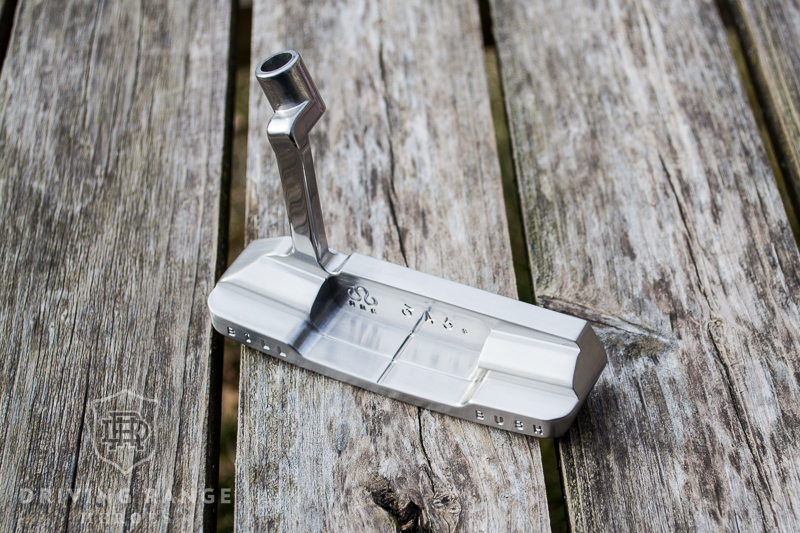
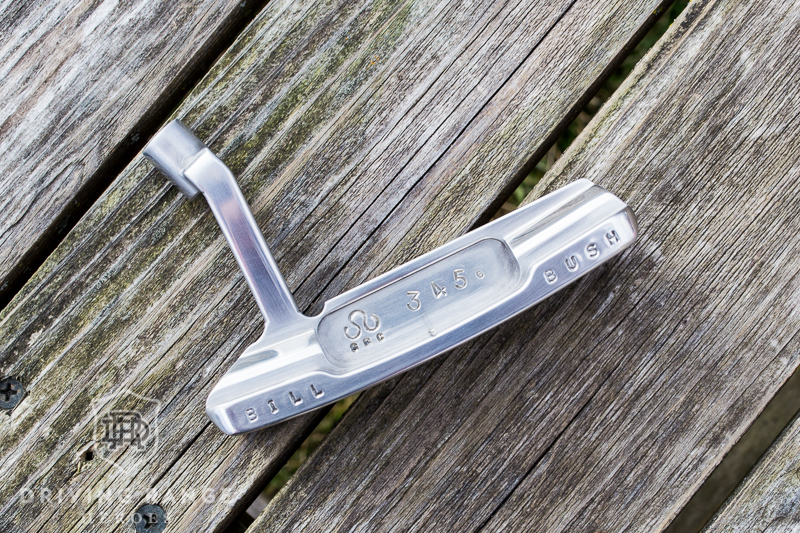
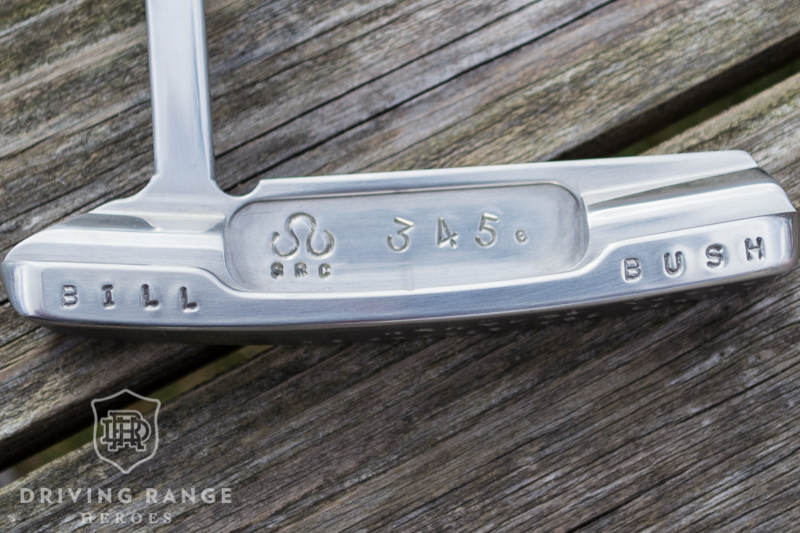
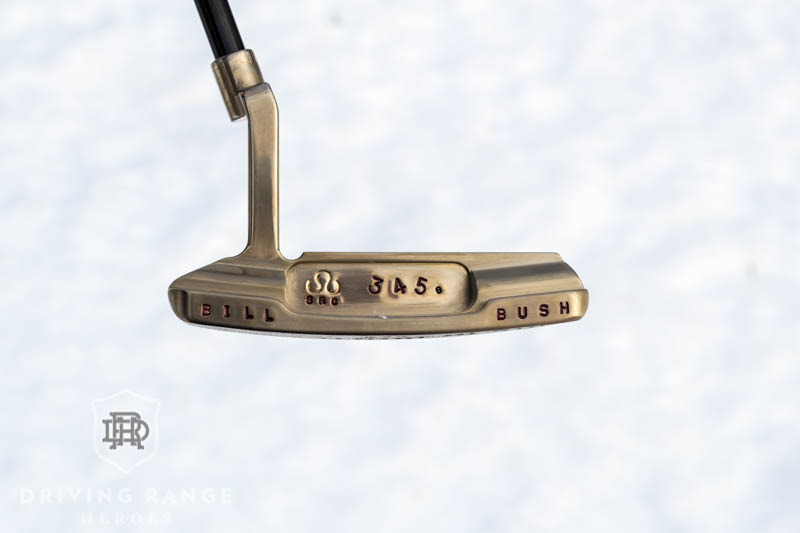
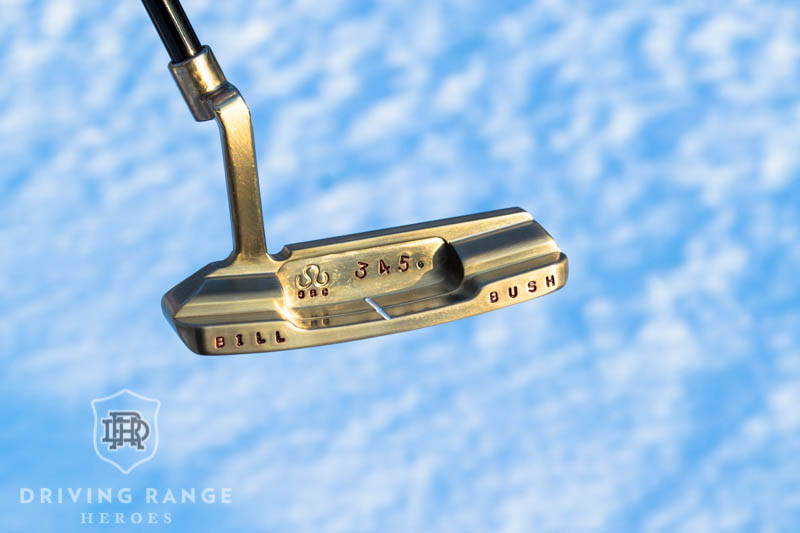
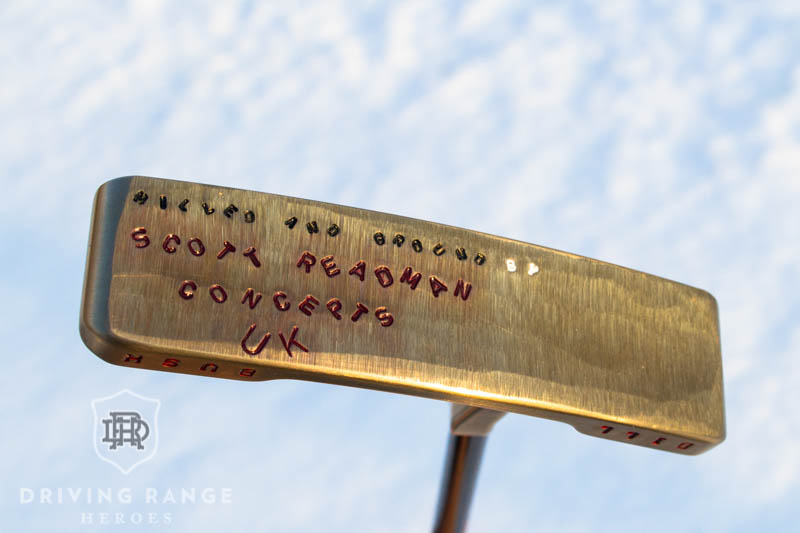
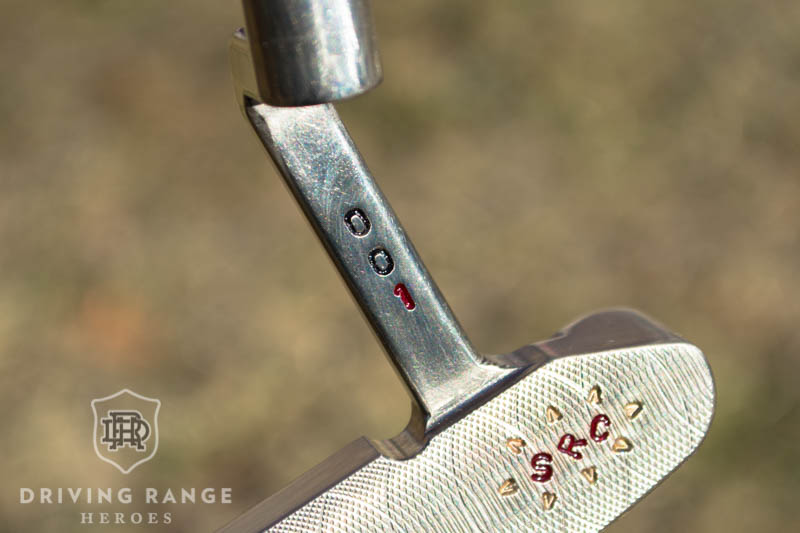
At this point, all that’s left to do is paintfill, shaft installation, and grip. Again, I’ll save “how-to” stuff for paintfill in a later post, but I ended up liking how a lot of the stamping caught the light after torching so I decided to leave some of it bare. My original plan was to do the paint in translucent blue, black, and white. At the last minute, I was looking at the putter and just decided the translucent metal flake red was the better call. Honestly, I’m a sucker for that color combo and it just felt right. Take note of the rugged-ground sole for painting. This created a challenge in cleanup. The “roughness” made the cleanup tough because q-tips and paper towels would sort of snag. You can also see the paint colors reflect in it in a weird way. Took me awhile to realize it was paint residue! It was a real test, but I’m happy with how it turned out.
At first I thought I was going to use a cool custom gold shaft, but then I thought that was way too much overkill. Wanting to keep this thing custom but cool, I went with the classic black putter shaft. You just can’t go wrong with it. Torched gold and black are a killer combo.
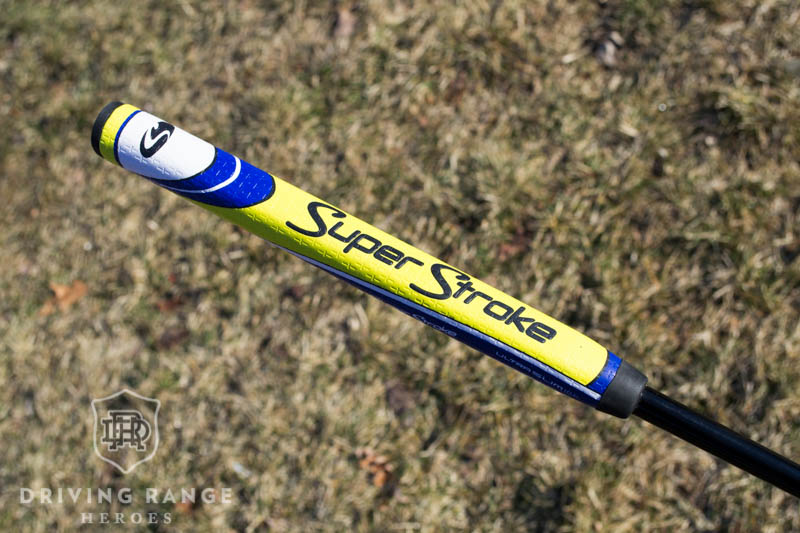
Last but not least, I found a super cool grip for this project. The grip is a Tour-issue prototype by SuperStroke that was a predecessor for the eventual Pistol GTR shape. I thought given the uniqueness of the project, having a rare and interesting grip was appropriate. The colors were a perfect match for my original paintfill plan too. Given the cool factor of the grip, I said “screw it, I don’t care if they match.” Plus, paint is easily changed.
Final Thoughts
From a sentimental perspective, this experience was amazing – especially for a gear nerd like me. I literally got to be a part of making this putter from the beginning with someone whose work I respect and get to call a dear friend. As far as the putter itself, there’s literally no way anyone will ever have anything like it. Knowing what I’ve poured into it personally will make it that much more fun to use on the course, and the story that comes with it is even better. Hopefully, when Scott sees the final product, he won’t be too disappointed in my work!
A very special thanks to Scott and Emma for all of their help in getting through this project!
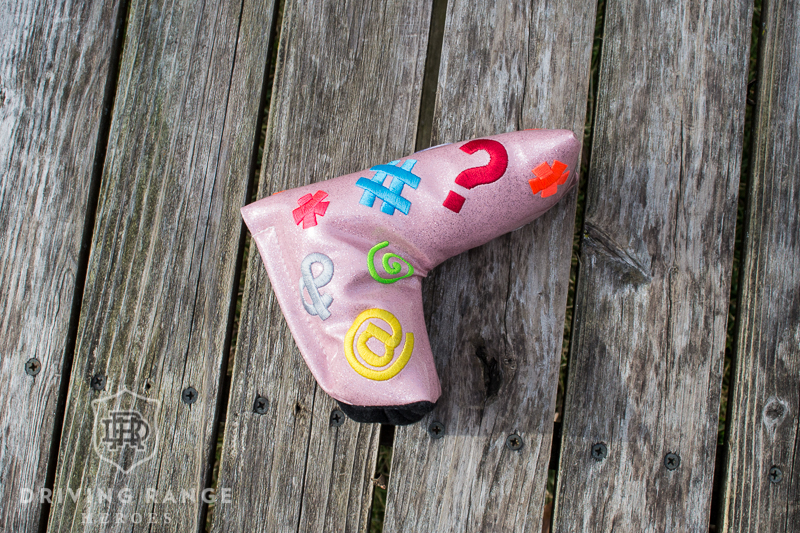 Also, special shout out to this wild “test” SRC cover that was the protector of this putter head all the way from England through the completion of this project. It served this putter well!


Can you buy a putter from you ?
You want to buy a putter from Scott. You can email them at info@scottreadmanconcepts.co.uk
They’ll get you a much nicer putter than I would!
Where would you suggest l purchase a reasonably priced right handed Scotty Cameron ? I live in Ontario Canada. This is an anniversary gift for my husband. Much appreciated – Josie
Straight through them. Contact them through their website and see what they can do. Get exactly what you’re looking for. They’ll take care of it.
Did you dip or seal it after torching?? Looks awesome.. trying to refinish my grandpas old putter the same way .
It’s stainless so I didn’t. Torching is pretty surface level, so even with a seal, it will wear with friction. Sealing tends to be more important with oxidized finishes like blueing and plumb finishes. That said, I’ve never been all that crazy about the easy DIY options along those lines, and if you send a putter off for one of those types of finishes, they’ll cover any additional treatments as necessary.