
The “Accidental” St. Patrick’s Day Project
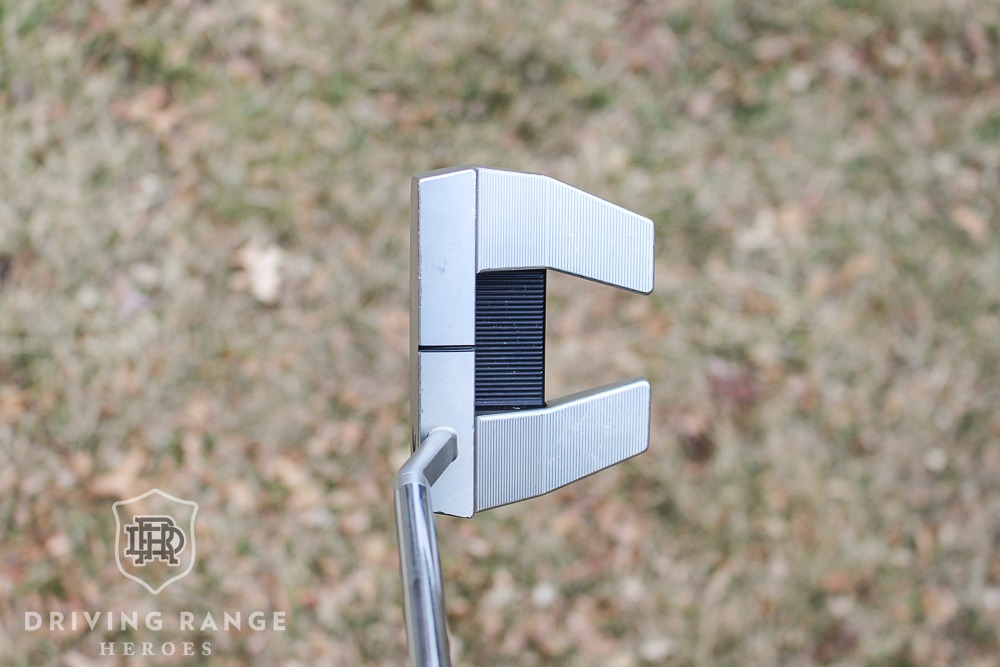
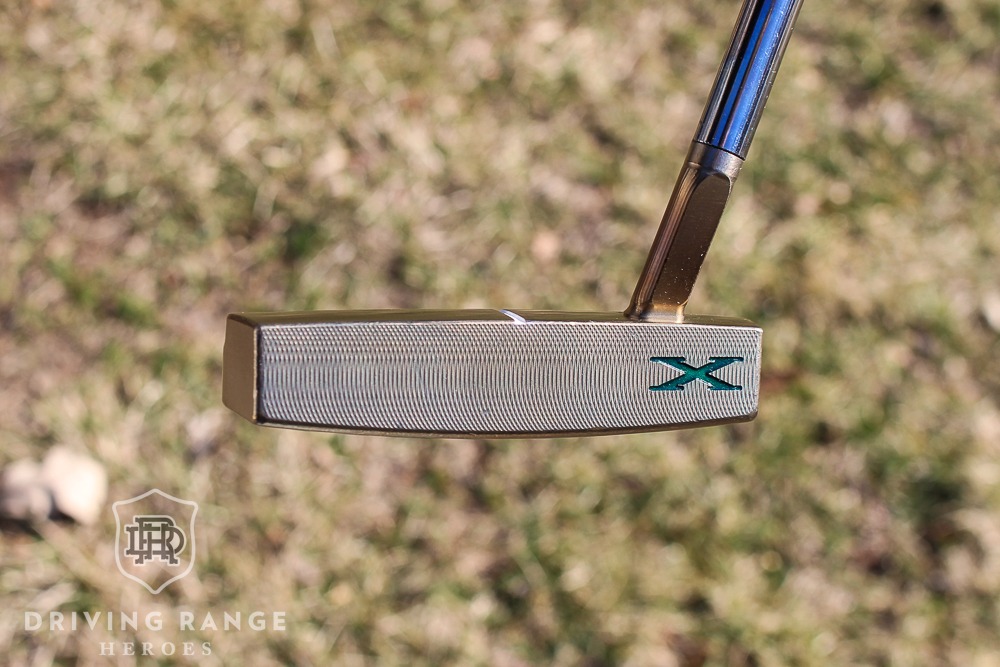
I’ve owned a few Scotty Cameron X5 and X5R putters over the years. Most of them, I’d customize, flip them for a small fortune, and move on. But I always regretted not keeping one. To be honest, they’re the only Cameron models I’ve actually liked over the last decade or so. Fast forward, I wasn’t necessarily looking for a new project, however, I stumbled upon a used Scotty Cameron Phantom X 5.5 at Golf Galaxy recently. It was in solid “gamer” condition and the price perfectly matched some trade credit I happened to have. So I bought it simply to have one back in the stable.
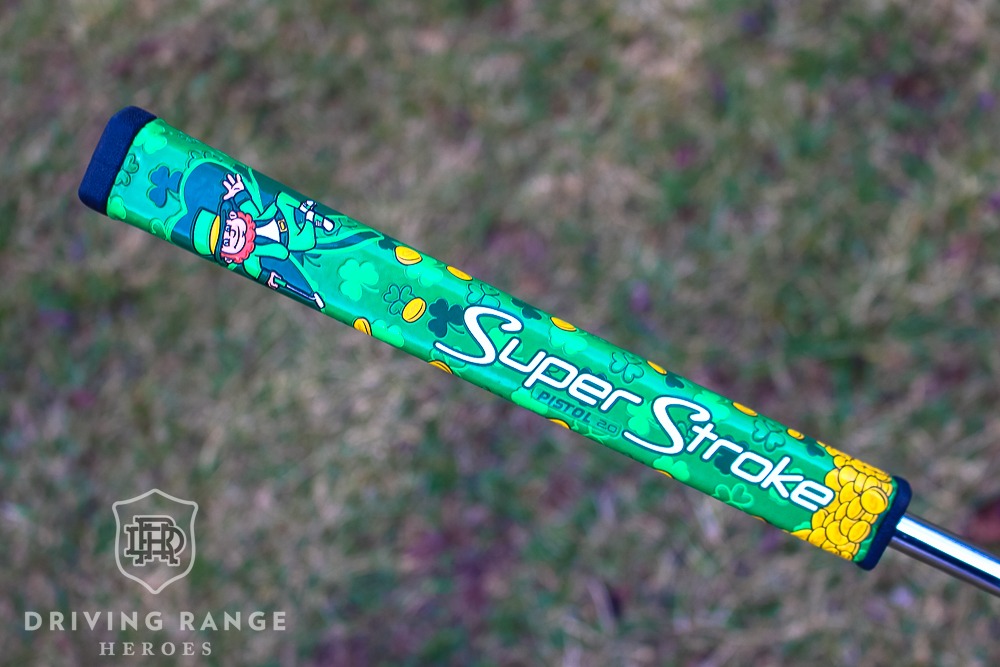

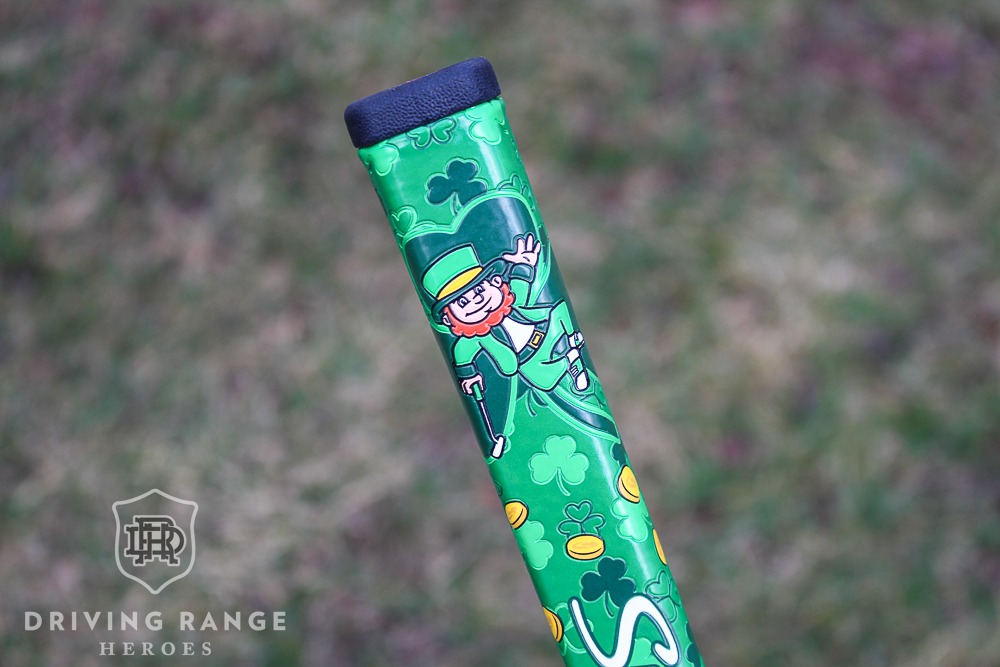
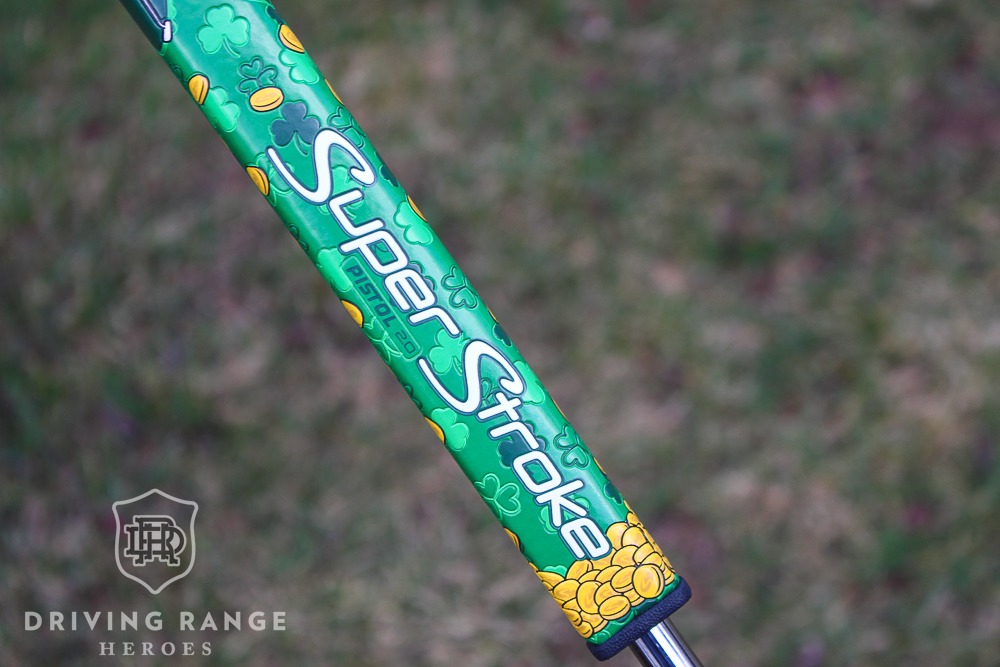
Then a limited edition St. Patrick’s Day grip from SuperStroke showed up in the mail. It was the exact spark I needed to take the putter apart and dive into a small project.
The Pre-Work Breakdown
Of course, the level of pre-work required is heavily dependent on your desired final outcome. In this case, I was looking at the St. Patrick’s Day grip and figured I may as well go a little extra for the fun of it. And for better content, obviously… To get the torched gold/wheat finish I wanted, I had to take the putter completely apart.
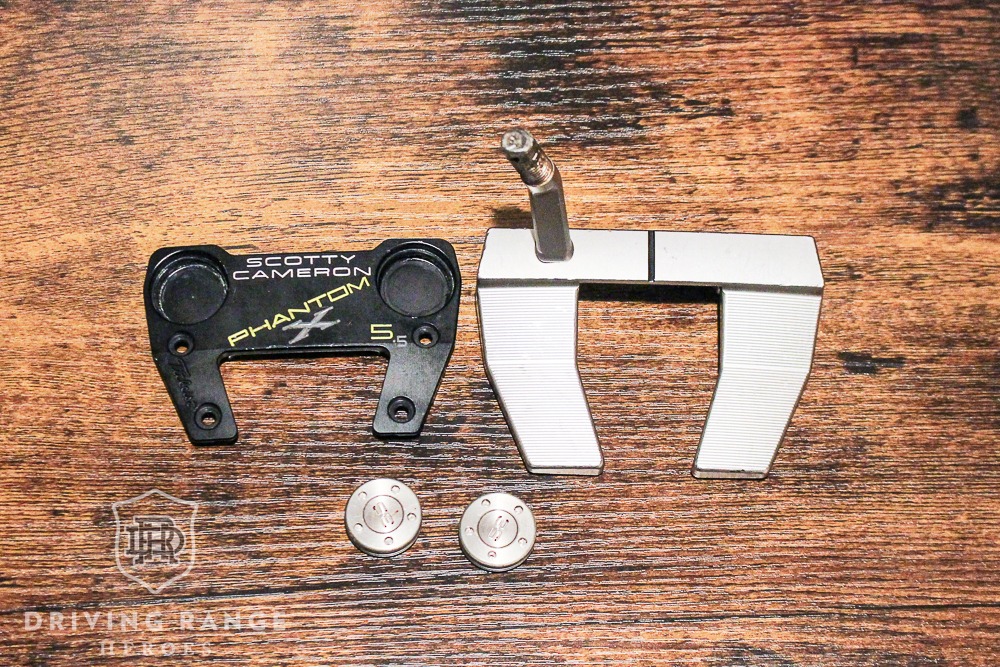
Note: if you’re going to torch, you HAVE to remove the shaft as well. Even without torching, removing the head from the shaft makes all of this work much easier to do.
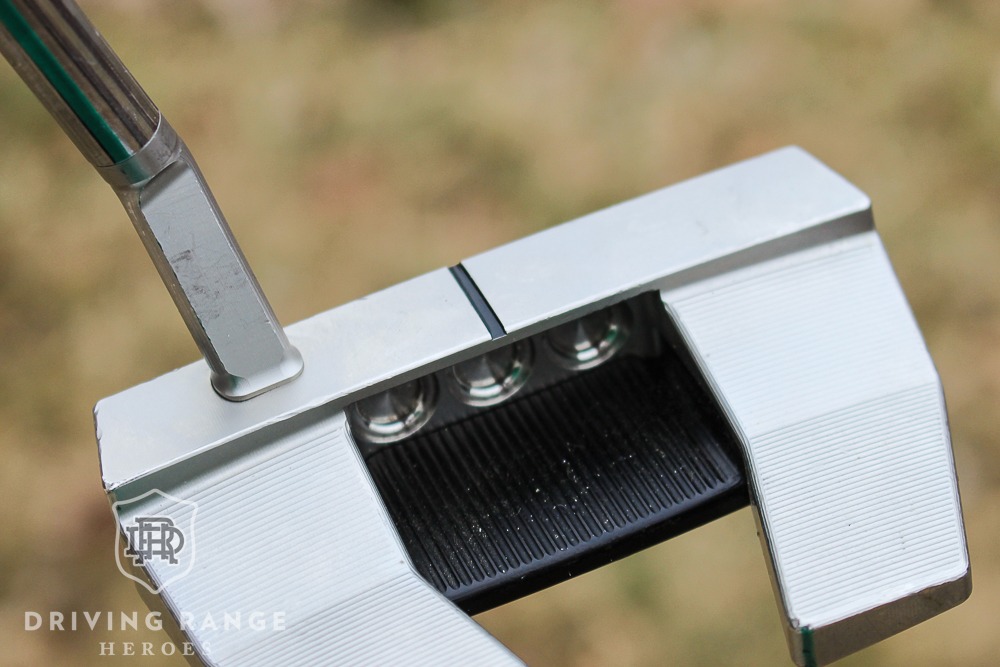
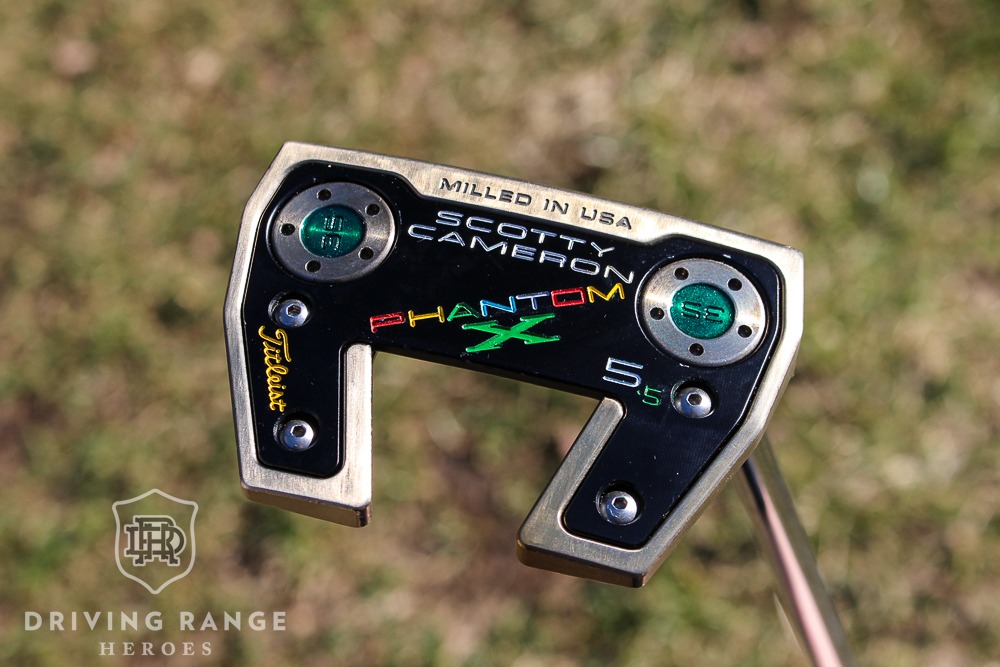
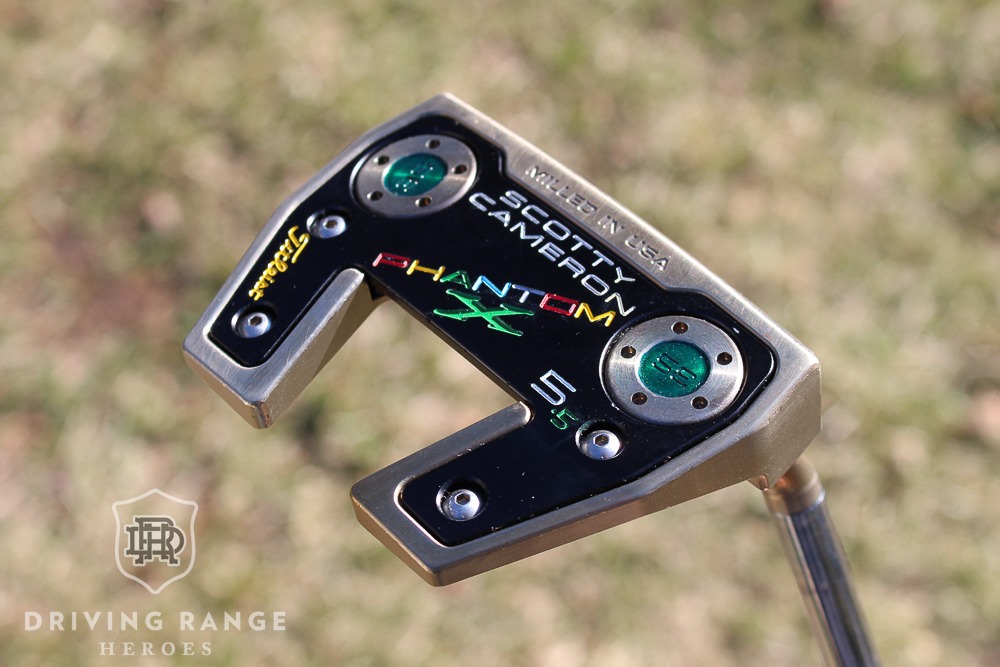
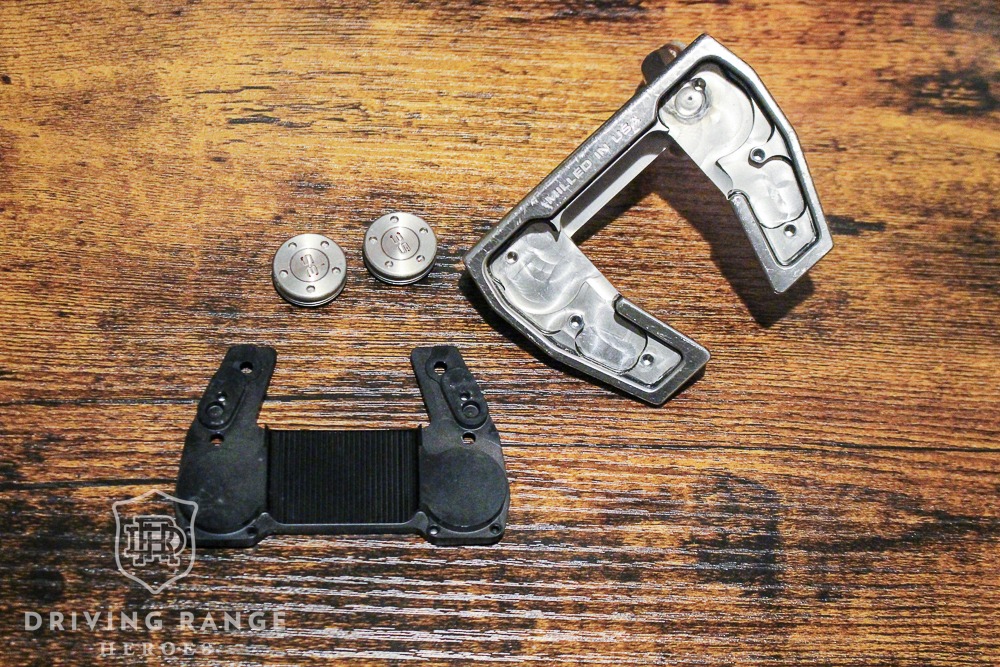
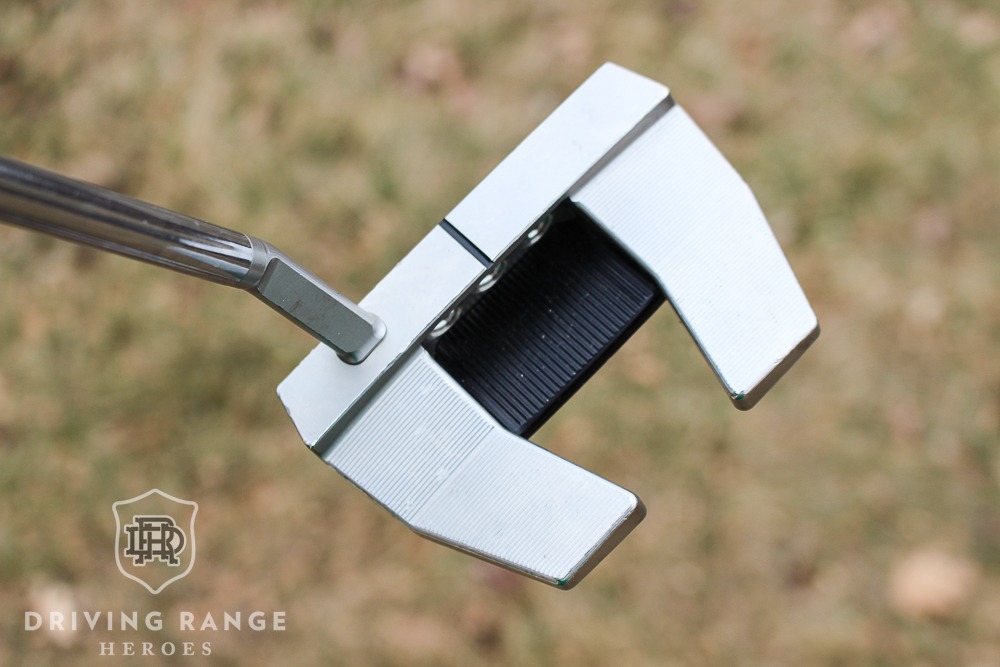
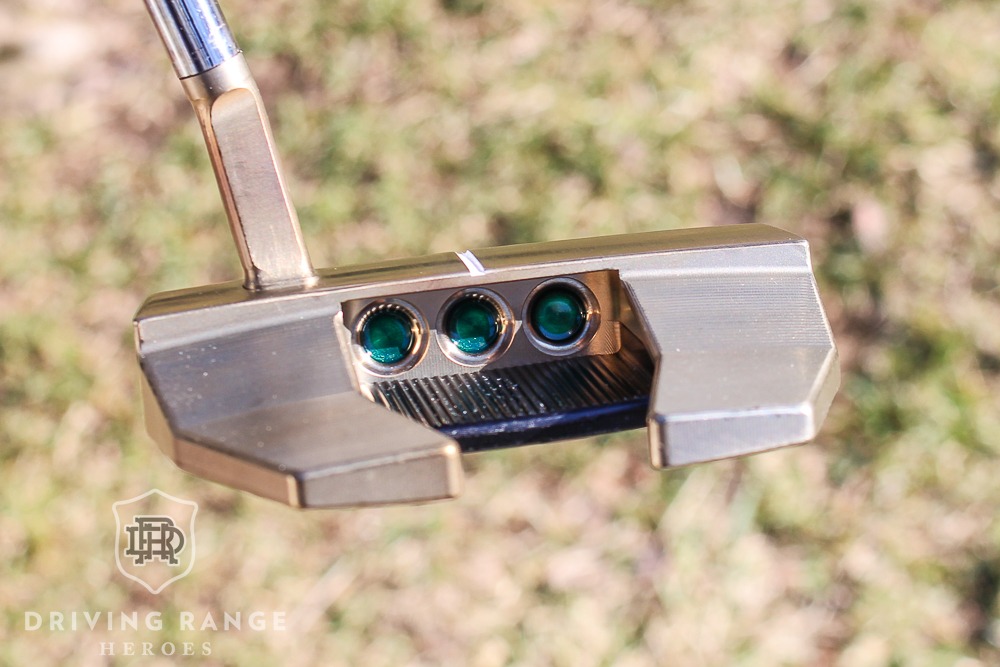
The first step is to remove the tungsten sole weights, which I would also torch to match the stainless steel body. The weights weren’t stock anyway. Fortunately, I have a couple aftermarket weight tools laying around that fit Scotty Cameron weights. (Don’t spend a million dollars on the official Cameron one.) After removing the weights from the sole plate, I needed to remove four small hex screws. Fair warning, these are super easy to strip, very difficult to quickly replace with “exact” substitutes, and are often tough to remove. (More on that shortly.) With the screws and weights out, now you just need to remove the sole plate.
Removing Phantom X Sole Plates and Scews
This is the critical pre-work breakdown hack here. The weights, screws, and sole plate likely won’t budge easily. The hex screws are held firm with dabs of loctite and the sole plate has double stick tape adding vibration dampening and more “connection” to the body. You can just hit all of these with a hair dryer or light heat fun to loosen them up. Just take your time and be careful. Once you remove everything scrape all the tape/tape residue off both parts, and remove the O-rings from the sole weights. And apologies for not taking a picture of the tape residue for reference.
The Dirty Work
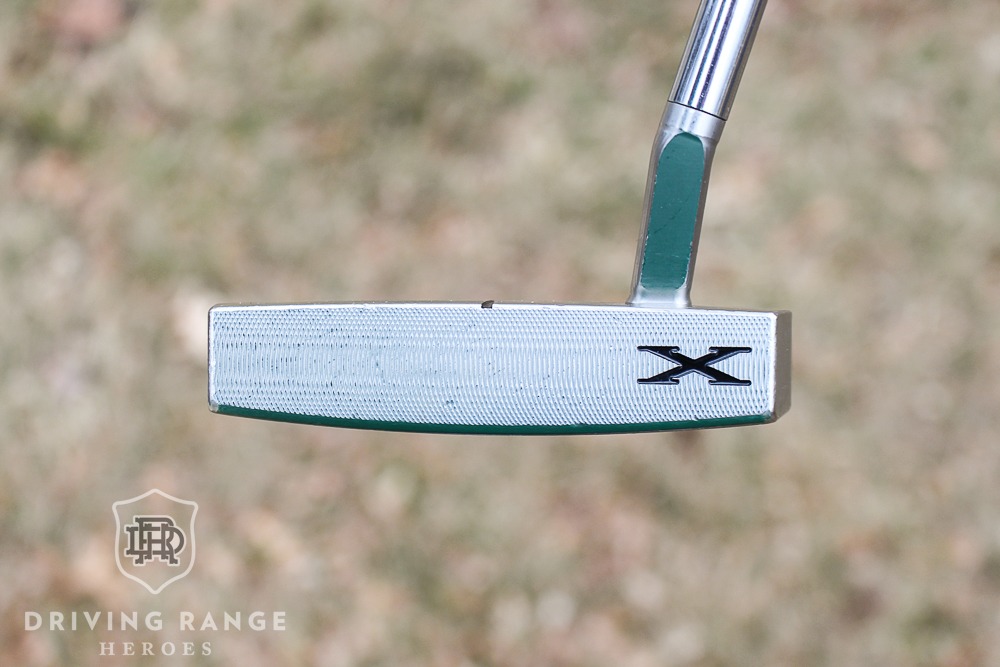
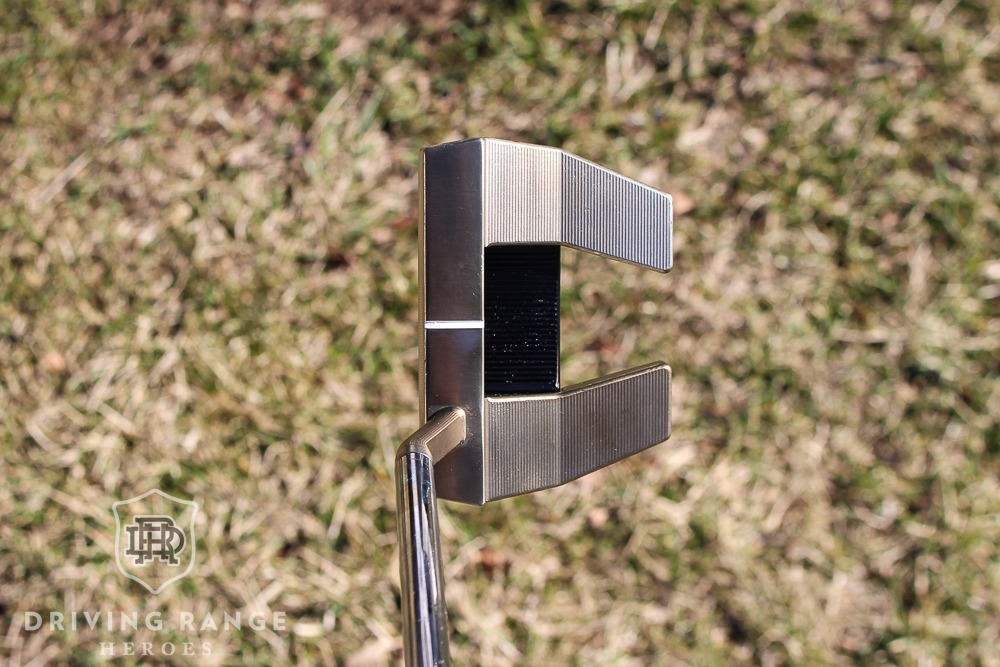
If I’m being honest, this is the part of the process that typically deters me from a custom putter project. It’s also the most important part. Whether it’s to get a good finish, or a high quality paintfill, you really have to do everything in this step well. I won’t go deep into detail around paint removal, but you can learn all about it here if you’d like. The biggest catch with this Scotty Cameron Phantom x 5.5 was realizing the “Scotty Cameron” on the sole isn’t actually filled with paint, but rather the exposed aluminum of the sole plate.
To take care of some of the deeper dings/dents along the edges and in the topline, I used some small hand files and just worked them as much as I reasonably could without heavier machinery or committing to a much more significant project. Then, to clean up those lines, I went through a series of lower grit sand papers with some wet sanding after hitting the putter with 220 grit. This looked a little too “polished” so I gave it a pass with a green Scotch-Brite pad and some elbow grease for a slightly smoother tone.
With this putter getting as good as it was going to get…or as much as I was willing to do, it was time to prep the body and weights for torching. This step is critical. Wearing rubber/latex gloves, I meticulously scrub all parts with a toothbrush and dish soap to remove any and all oils and grease. Then only handle the cleaned parts with a blue shop towel or gloves until torching is complete.
Putting Everything Back Together
Again, I’m skipping the details of torching. If you want to learn more about the torching process, click here. With torching complete, it was time to paint. I bought a bunch of fresh enamel paint and matched the color scheme of the St. Patrick’s Day grip the best I could. Except for the metal flake green on the gold parts because I just that’d look cooler. And it did. Once I finished painting, it was just about re-assembly.
This is all pretty straightforward and you probably don’t need me to go into great detail. Put the O-rings back on the weights. Critical for keeping moisture out of the threads. New loctite on the hex screws is optional, but certainly not a bad idea. (I’ll be honest, I never use it and I’m certain it’ll come back to haunt me one day.)
THIS is the most important part about re-assembly. You have to replace that double stick tape I mentioned earlier. If you don’t, the putter sounds “tingy” and feels terrible. (In my opinion…and plenty others on golf internet.) This thread on WRX provides pretty good insight on this, and is where I got direction for picking a tape. Naturally I forgot to take pictures of this step as well, but I used some Scotch Indoor Double-Sided Mounting tape I bought on Amazon. The putter felt and sounded great with this, and now I have a ton leftover if I need to stick anything to a wall in my house.
Final Thoughts – Custom Scotty Cameron Phantom X 5.5 Putter
I’m not trying to claim this thing is winning any awards or that it’s everyone’s cup of tea, but it was fun to do and a nice change of pace. More importantly, I can’t remember the last time I did a club project like this so it was nice to get back on the proverbial horse. And I’m 100% certain that at some point, I’ll decide I wished I did something different so I’ll tear it apart and start all over. (At the time of publishing this, I already wish I did…) Or better yet, knowing me, I’ll sell it, make a few bucks, and then wish I still had it. Regardless, it’s a fun conversation starter, a great use of my new SuperStroke Pot O’ Gold putter grip, and a solid excuse to make some content here on DRH.