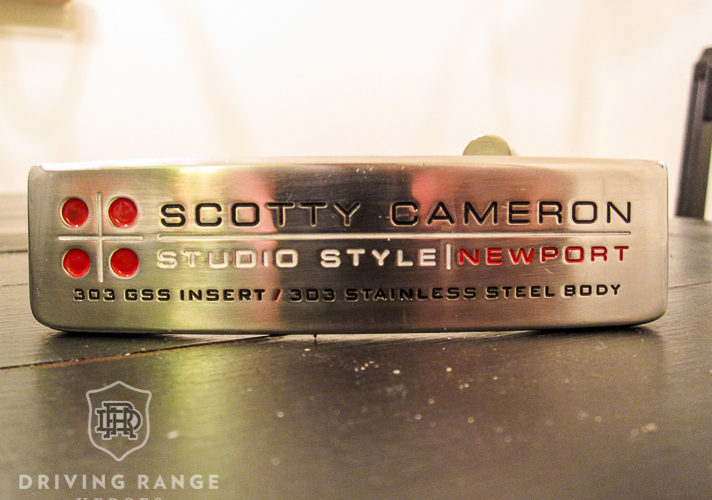
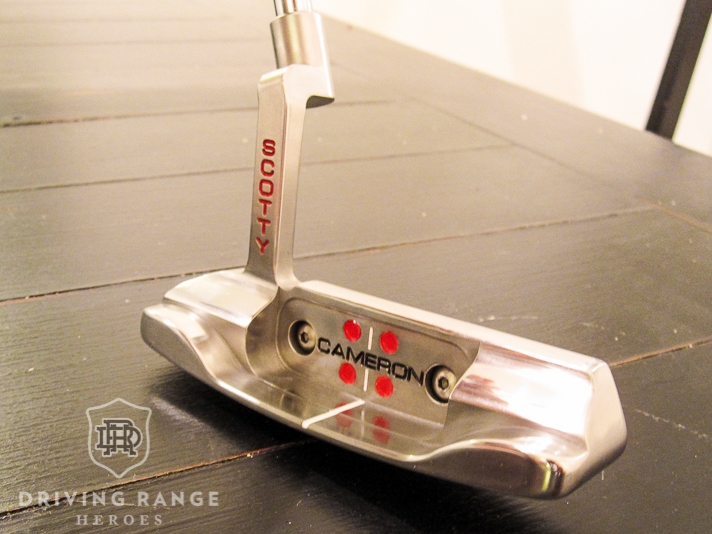
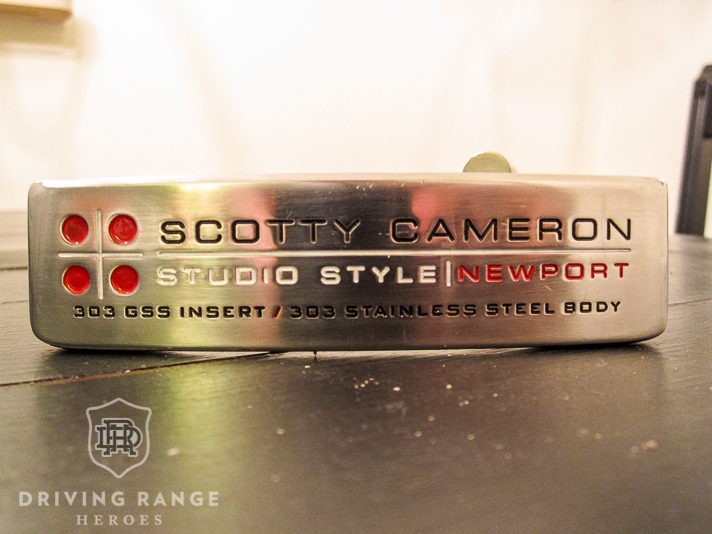
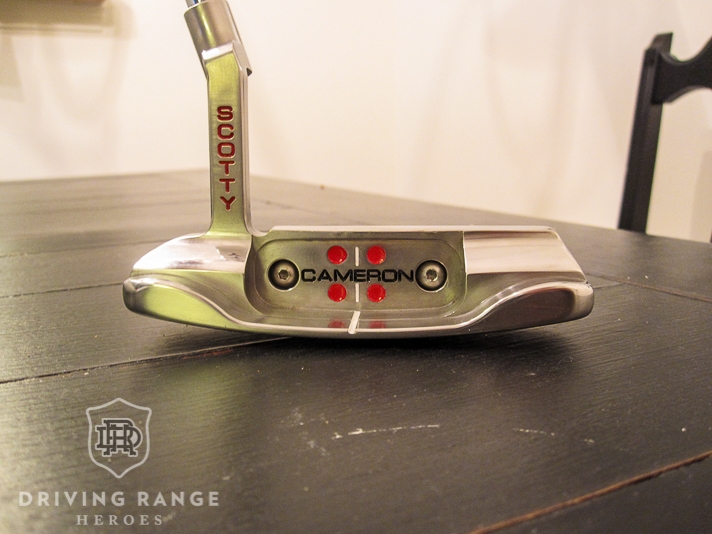
My Old Scotty Cameron Studio Style Newport
Since we’ve been stuck in quarantine for the Coronavirus, I’ve been jonesin’ for a project to work on. Unfortunately, there isn’t really anything laying around here and the prices for good candidates on the internet are terrible. Then one random day I was working on some photo editing stuff when I stumbled upon a folder that had some old putter pictures in it. In said folder, I found pictures from the first putter I ever “restored.” It was a Scotty Cameron Studio Style Newport I bought off the used rack for $125 about ten years ago. This reminded me that this putter has been through a few paint changes over the past decade and could do with a tune up. Not just paint, but a mild refinish to get it cleaned up again.
I bought this putter with the intent to learn how to do some “restoration work” on my own. Knowing I had never done this before, I was on the lookout for something that I knew wouldn’t take heavy machinery. Especially in the face. This Studio Style Newport had a few notable dings, but nothing I thought I couldn’t manage. The next step was to send it off to the Scotty Cameron Custom Shop to get the grip, shaft band, and headcover I wanted for when I was finished.
Once it came back roughly a million days later, I immediately pulled the head and got to work. This post will cover my original efforts to customize my own putter. There will be future parts to this story covering more phases.
The Dirty Work
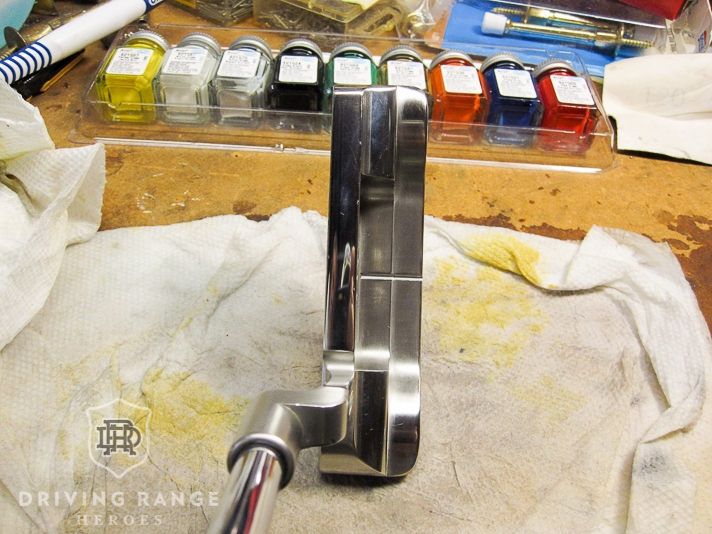
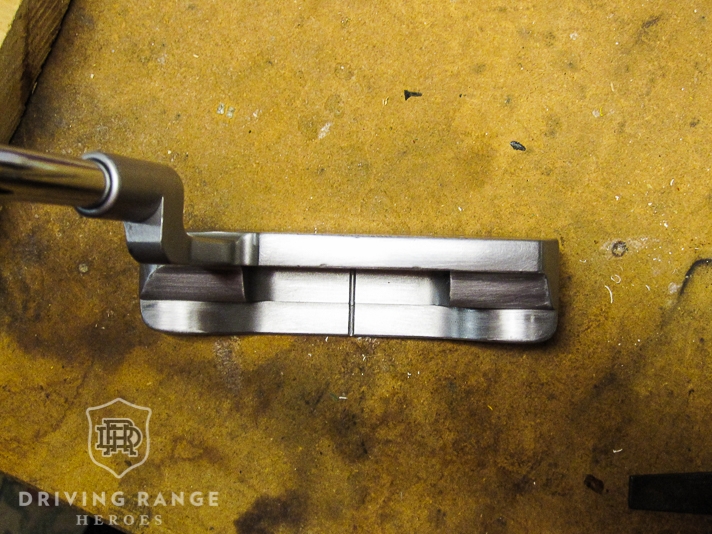
The first step was to remove all the paint. Didn’t HAVE to be the first step, but I made it the first step because why not? I figured it would be easier than doing it later.

There were a couple of dings in the topline, as well as a few others. (You can see some remnants along the side of the topline on the cavity side in the finished product.) I used a combination of files to work out said dings. The key is making sure you address the ding while keeping the shape of the putter smoothly blended. I think this went as well as possible. Of course, this left some serious marks that needed to be worked out. Onto the task of sanding.
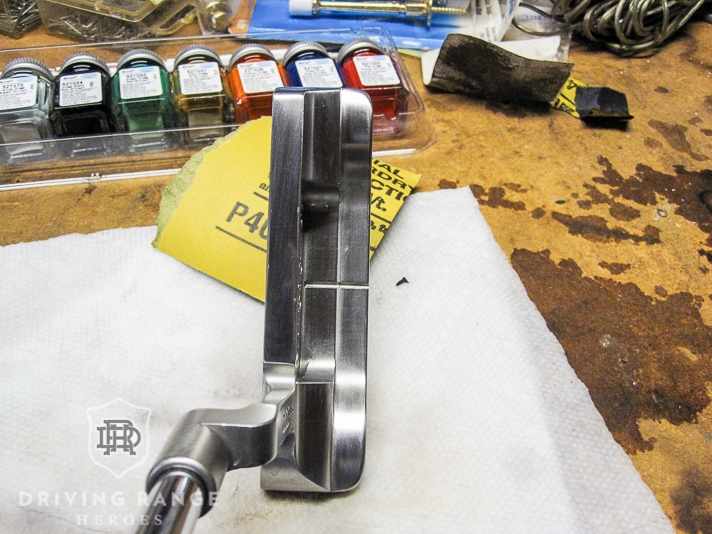
This was the longest and hardest part of the process. Given my tools and resources, I did this whole process by hand. I worked my way from roughly 80 grit sandpaper through 1000 grit sandpaper. At 400 grit, I did a dry sand, then a round of wet sanding with 400 grit. From that point on I wet sanded at every grit. Trust me, this process is tedious and you’ll go through a LOT of sandpaper taking out all the marks from the previous sanding efforts. The key is to sand consistently and smoothly to avoid creating any hot spots.
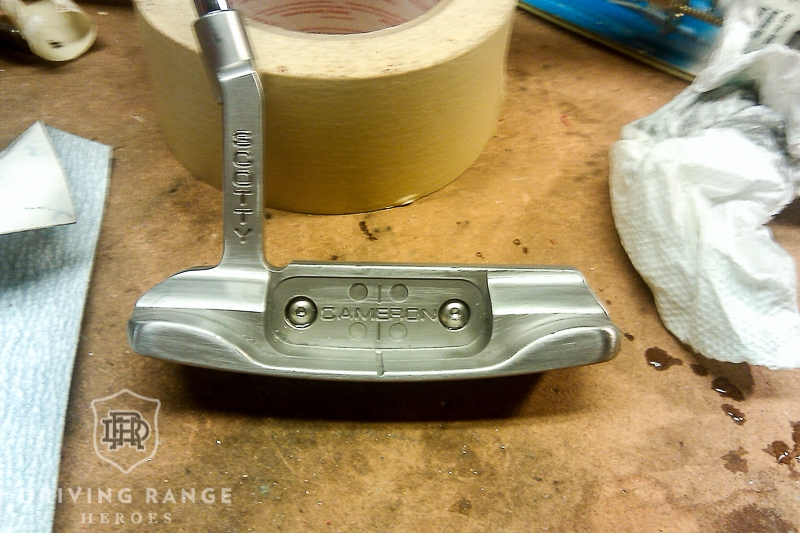
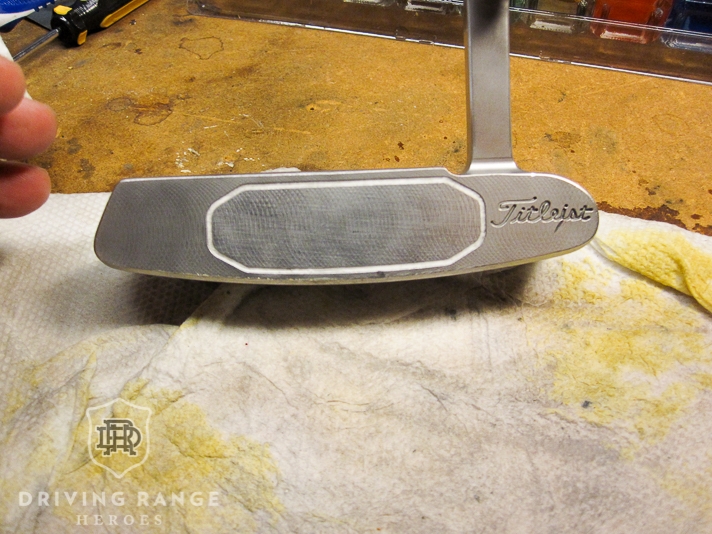
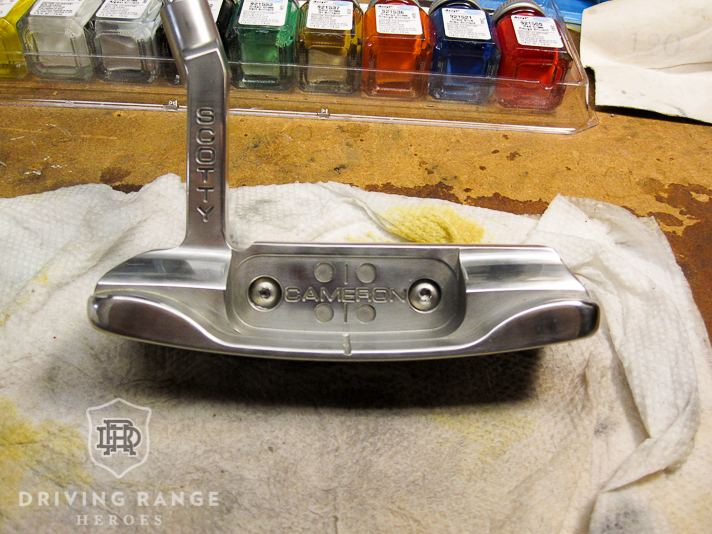
NOTE: I left the entire face alone. I didn’t want to damage any of the light face milling. Unfortunately Scotty Cameron doesn’t do this light milling anymore so I didn’t want to risk it!
Finishing Touches
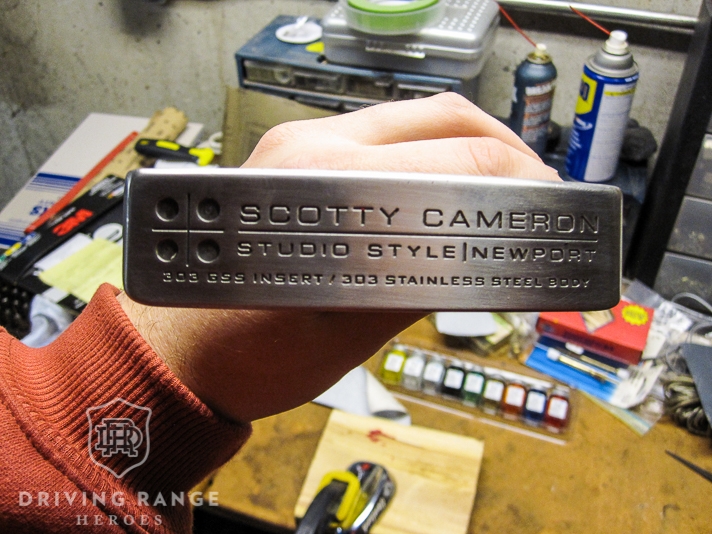
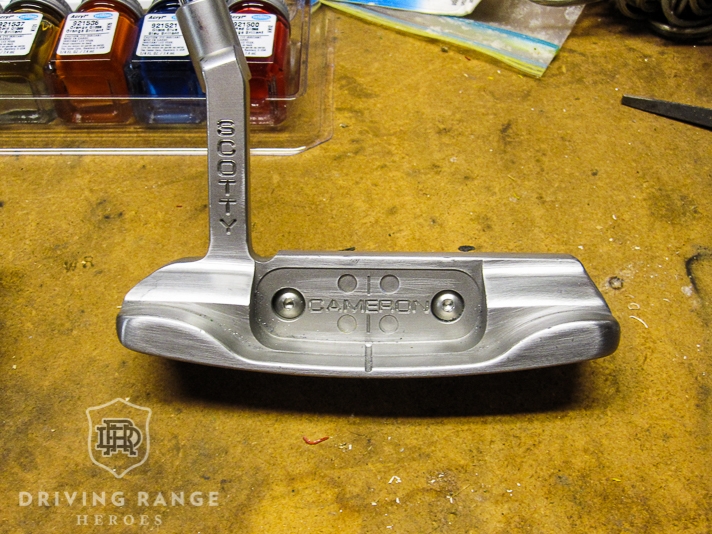
Once I had a clean, finely-sanded finish, I was almost ready to call it finished. Then I decided a nice high-buff polish might look nice. This part was fairly easy, it just took time and diligence. Given my available tools, I used Brasso and a Dremel with polishing attachments. It worked well and I got a nice bright finish.
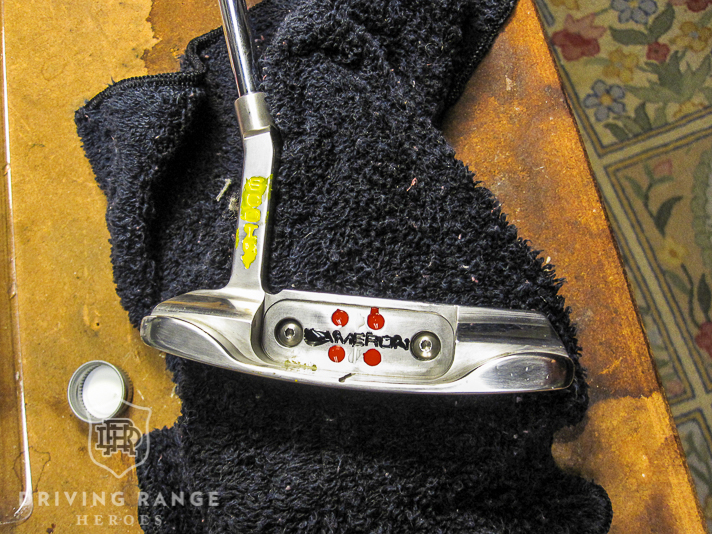
This was actually the club I first learned how to paintfill with. I started with a pretty basic set of colors (my usual black, red, and white) and got to work. I quickly learned that the Scotty Cameron Studio Style putter is one of the most annoying paint jobs in golf clubs. There are SO MANY letters to fill and very tight quarters. Once I finished, I had a few dashes of yellow in the mix that I just didn’t like. I removed that yellow and filled it in with red. Done deal…or so I thought.
Final Thoughts – Scotty Cameron Studio Style Restoration Part 1
I loved this putter when I was finished. I’m not sure if it was the satisfaction of accomplishment, or if it was because I thought it was legitimately cool. Naturally I never putted well with it on the course… As a result, over the years this putter basically sat in my office and occasionally would get some new paint – and still never made it to the course. Stay tuned for Part 2 of this putter’s journey where we’ll discuss those changes and my most recent plans for it.


Mr.Bill,
Nice sanding work and great paint job! But I must tell you that if you restored your putter back to the original paint colors and stuff your putter would be worth somewhere between $750.00 low side price to a high price of $1750.00 but it has to be mint to get that… I sale these putters as a hobby. Right now I think I have about 23-25 of these Scotty Cameron Putters. Do you do work for the general public, if so I’d like to send you some putters so I can check the work you do??? Do you have a price lists of your repairs and restoration work?
I’m not 100% what you’re getting at here, but the idea was to make the putter into what I wanted it to be. Not about resale.
Great job Bill
I recently refurbished a Scotty Cameron Newport mid slant and use the satin nickel spray paint. I painted over all the lettering to give it more of a embossed look and it looks great and since I’m a clubmaker,I had blown off a new red Scotty Cameron putter grip from another Potter and put that one on this club and I’m going to give it to my 11 year old grandson when he’s 15 he’s 11 right now
Hi Bill
Fascinating article. Oddly I have just started collecting Scotties. Just acquired a Del Mar 2 Teryllium 1998 One of 500.
I would be interested in trying to restore it. Any chance of getting a few tips on things like repaint and such. Mine does not have caulking around the insert. So it may be an early one. Thanks for any advise you can offer.
I’d say read through all the parts of this project (I think there are three parts) and you should get a few insights. Also, search how to paint on our site and there are tips for that. Basically, take a look through our ‘Workbench’ section and you should find some useful stuff. Feel free to comment on any of the posts with questions!
Bill
What is your preferred brand of enamel?
To remove the paint from my Del Mar 2 Teryllium.
Is it ok to soak it in acetone. Would it be harmful to the insert.
I have some tiny dings in the insert. Can they be polished out without compromising the putting surface.
Cheers.
Testors enamel by a mile.
Acetone won’t ruin the black oxide finish BUT you will have to redo the white “absorber” material (which is just bathroom caulk) if you soak the head in acetone.
If you want to take a stab at taking dings out of the insert, I’d remove it and polish it that way. Just be careful you don’t take too much off and it’s now recessed from the face when you put it back in. If you try and polish it with a compound while still in the putter, I’d be shocked if you didn’t take off a little of the black finish outside of the insert.
To remove that insert, you’ll have to get all that caulk out, get the the right Allen wrench size (no idea what it is) to remove the now exposed screws, and then remove the insert. Not the hardest thing in the world, but not a minimal task either. Frankly, I’d just leave it.
I just did my first Vokey wedge restore and paintfill. They are smoke (oxide) finished. To get the old paint out I soaked them in nail polish remover but got nervous about the oxide finish even though I was going to re-blue it later. I only soaked it for about 10 minutes and the paint wouldn’t come off. I ended up using a dentistry pick to scrape it off and out. Should I be more bold with the acetone soaking and for how long? Agree with you on the Testors enamel by the way. Great stuff.
Acetone won’t remove a finish, just paint. Let it soak longer. OEM paint typically stays in better so it needs time. It’s also helpful to score the paint and let it soak some more.
Toothpicks also work well for paint removal because they’re softer and will fit themselves into smaller spaces.
Let me guess… You took it out for a round or two and it started to rust? Mine too 🙂
If Im right, how did you deal with that unforeseen problem?
I never had any rust issues. What/where got rusted?
Where can I purchase a restored scotty carmon putter.?
In case you didn’t catch it in the other comment you posted, I’d say it’s tough to say. eBay, golf forums, etc.
I don’t sell them if that’s what you’re asking.
Instead of sandpaper for polishing and removing dings I would use honing stones. Available in different grits on Amazon. Cheerbrite has a small size assortment for about $12. And remember that these can be shaped on a bench grinder or dremel or? To fit grooves radii and any other hard to reach areas by bring to shape. But be careful not to remove too much material, even a couple of grains in weight can change performance, carefully weigh the putter head on a grain scale before and after restoration. You may find that adding some carbide powder to paint will add weight to make up for losses in weight distribution. Hope this helps.