How to Paintfill Golf Clubs
Hi, everyone, Bill Bush of Driving Range Heroes Dot Com here. The resident Workbench expert* of the site. Some time ago, I wrote a post explaining how to paintfill your golf clubs. Thanks to my fan, Chris V, and painting with Scott Readman in England, I was reminded that I have changed up my techniques a little bit. Many of the basics that I covered in this post stay the same, as I often say, “there’s more than one way to skin a cat.” In this post I’ll give you a couple of updates to show you how to paintfill golf club.
Getting a Good Paintfill
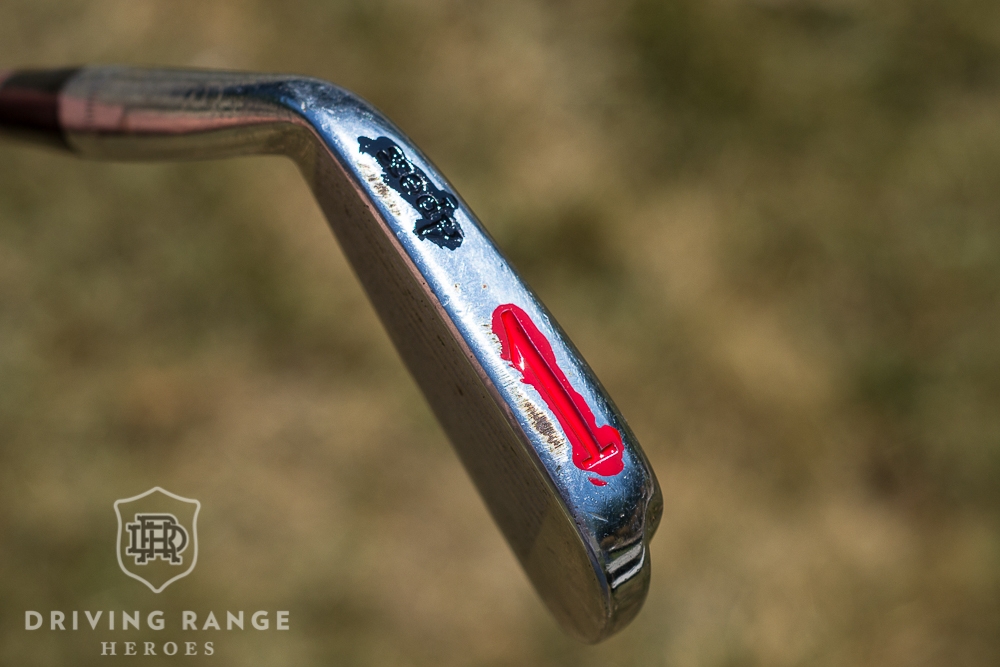
Ok, so this is a big difference from how I used to paint. Previously, I’d just get a huge glob of paint in a space and aim to get it right just one time. This can sometimes lead to bubbles, redos from cleaning too much paint out, and just general headaches. Now, I do a layer, use my new cleanup technique where possible (explained below), let the paint fully cure, and then do another thick layer, and repeat the process.

By letting the paint full cure, you’re able to fill in any gaps and get nice even layers. Again, you’ll get a feel as you mess up and succeed with your projects. Some areas being painted won’t require multiple layers. Also, in some areas (like cherry bombs), I just can’t get multiple layers to work yet. So I do one thick heavy layer and clean it up very carefully. Again, learn the touch. Anyway, multiple layers can give you much richer, deep paintfill and is now preferred method.
Cleaning Up Excess Paint
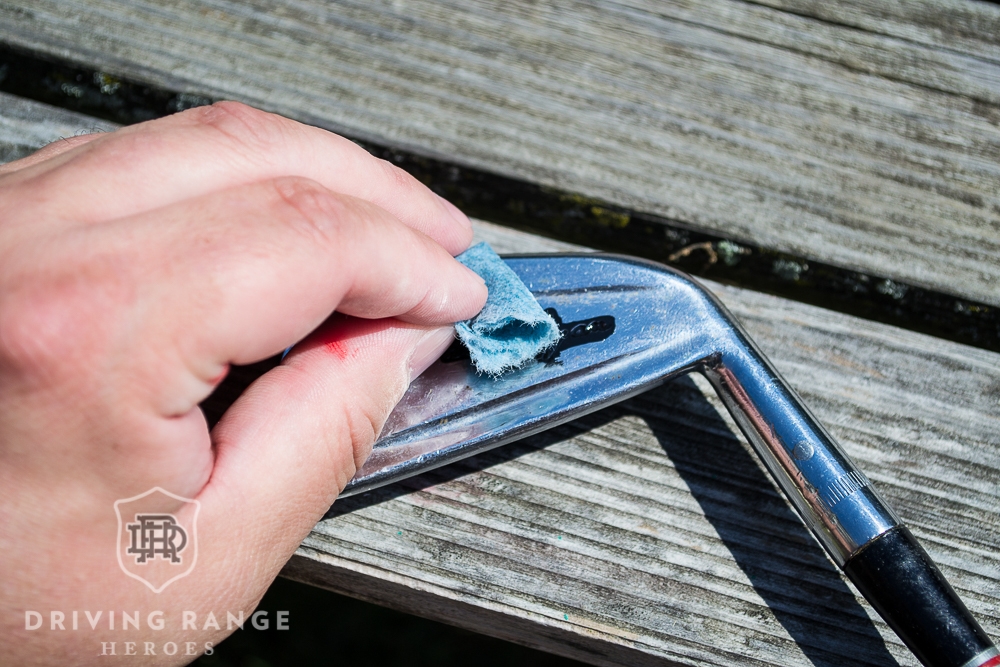
Historically, I’ve used the q-tip/acetone cleanup method. This still works, but I’ve come to like a new process better for most things. Now, you still have to paint in phases (like from the middle out, and maybe consider your color order), but this technique has allowed me to work quicker. Before cleaning it up, maybe give the paint about 5 to 15 minutes to cure up just a touch. You’ll get a feel for where you can and can’t get away with this.
I tear up lint-free blue shop paper towels into squares/rectangles. The stiffer the towel, the better. Next, I fold it up into a nice tight square and either dip it in acetone or hold it over the top and pour some into it. From there, I just sweep over the paint in a single direction until the excess paint is gone. You may run into spaces where it takes too much paint with it and the paint is thin, but that’s ok. We’ll address that later. The key is to make sure you have an even layer, or at least even enough that it will fill in with more paint.
Two notes here. I don’t use this technique in big spaces such as cherry bombs because it just wouldn’t work. I may use a variation of it to clean up around the cherry bomb while it’s fresh, but I avoid getting anything in the circle as much as possible. You can also use small model “swabs” or q-tips to touch up areas you can’t seem to get clean enough. Just be careful, yet firm. Those model swabs work miracles for me.
Remember this process, you’ll likely use it multiple times in most cases.
Final Thoughts – How to Paintfill Golf Clubs
Like I said, there are many different ways to manage your paintfill, but these are the latest techniques I’ve found to be very helpful. Just get some practice and be patient. The good news is, you can always redo anything you screw up. You’ll get used to it as you figure out what does and doesn’t work for you.
Good luck!
*Editor’s Note
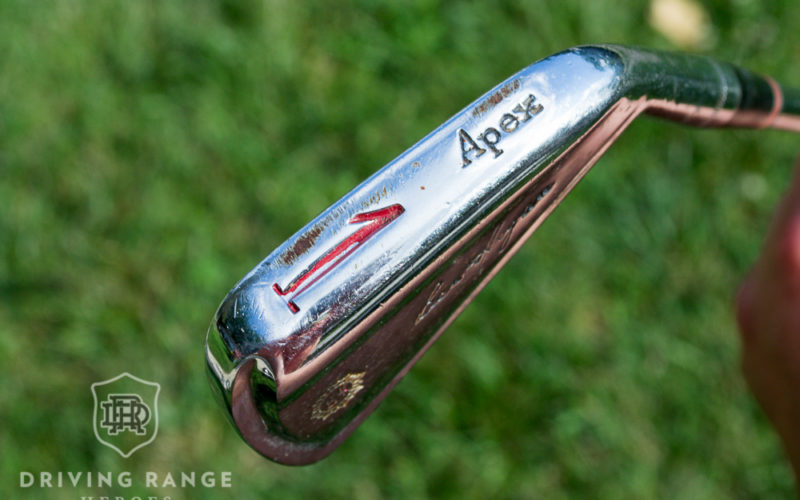
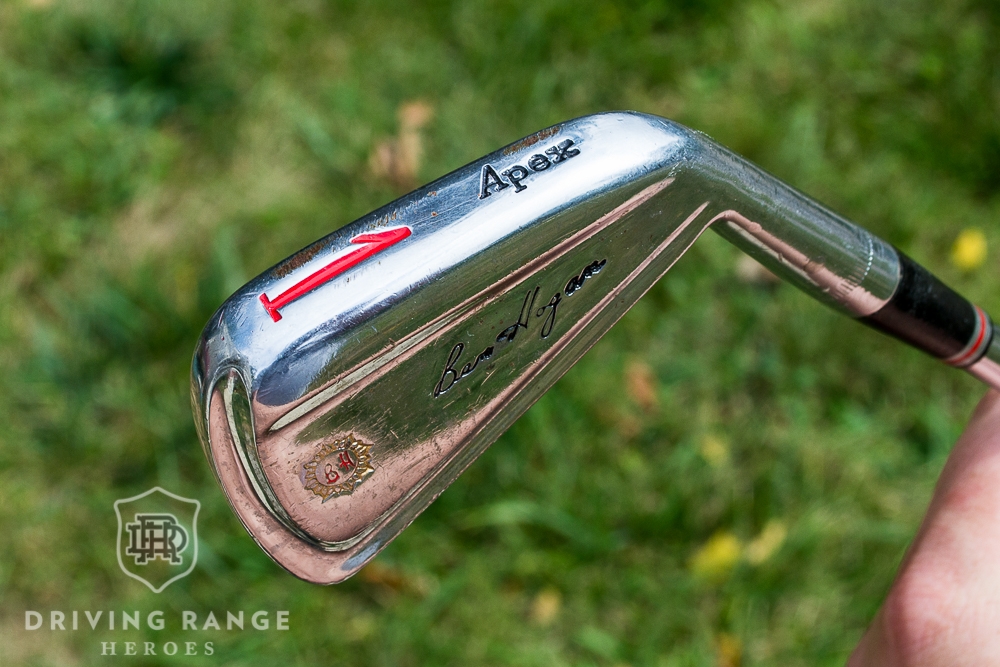
I just want to point out that this post came about because I had this old Hogan 1 iron that needed some new paint. Unfortunately this later era of Apex irons (non-frosted from mid to late-ish 70s) has pretty poor stamping so the paint doesn’t set great. Not my greatest paint work, but this was the project I had when I wrote the post. The techniques still hold true.


Do you have a video of your technique?
I do not, but hopefully someday!