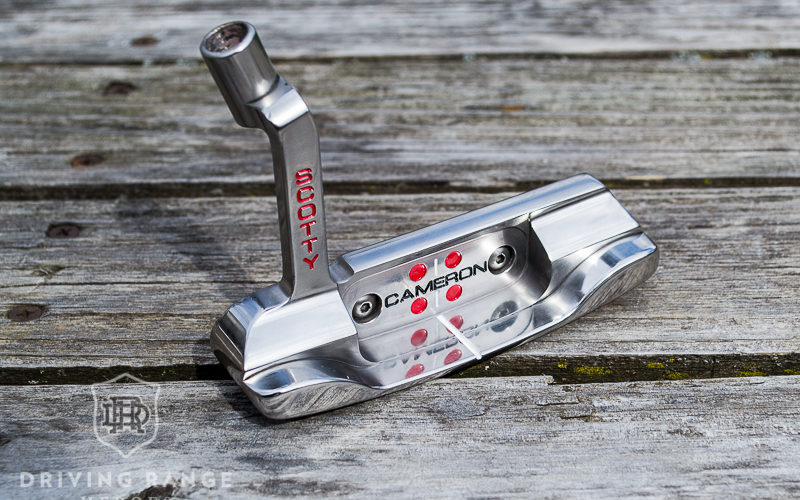
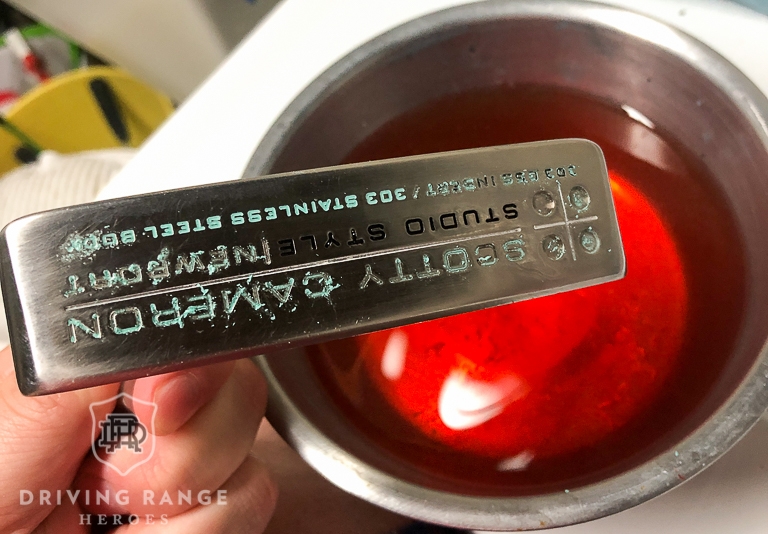
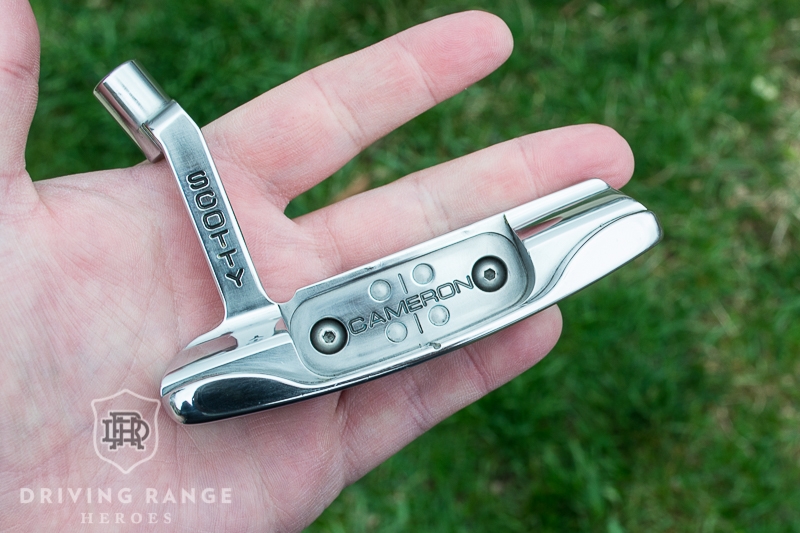
Restoring a Scotty Cameron – Part 3
If you haven’t read the first parts of my story about restoring a Scotty Cameron Studio Style Newport and you want to get caught up, Parts 1 and 2 can be found here and here. I left off talking about how I needed a project during COVID shelter in place and chose this putter. My goal was to get it looking good again and bring it back to its roots from ten years ago.
The Dirty Work
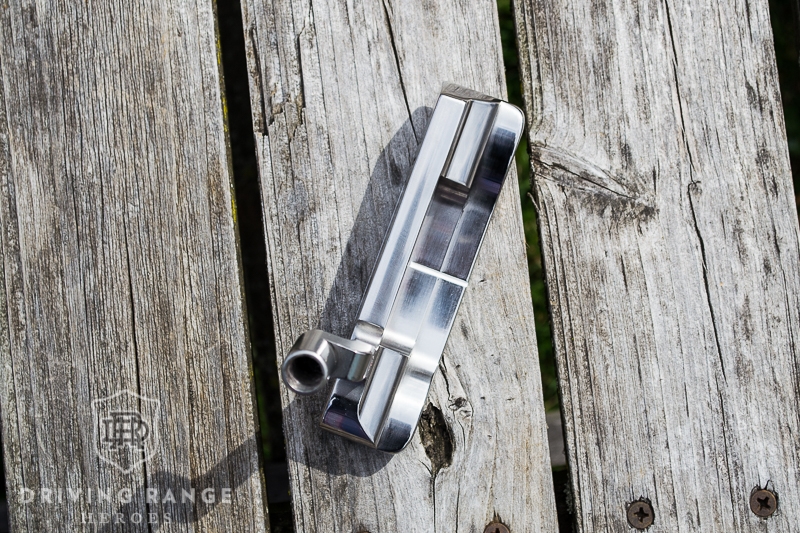
If you want to do a job like this the right way, you have to remove the paint first. You’ll want a clean base so your finish and paint look good. This step took FOREVER, which I should have remembered. I’ve experienced the same thing every time I’ve repainted this putter and it’s a nightmare. There are so many small letters and it’s difficult to scrape them out when they don’t just fall out on their own. Quite a bit of my project time went into paint removal.

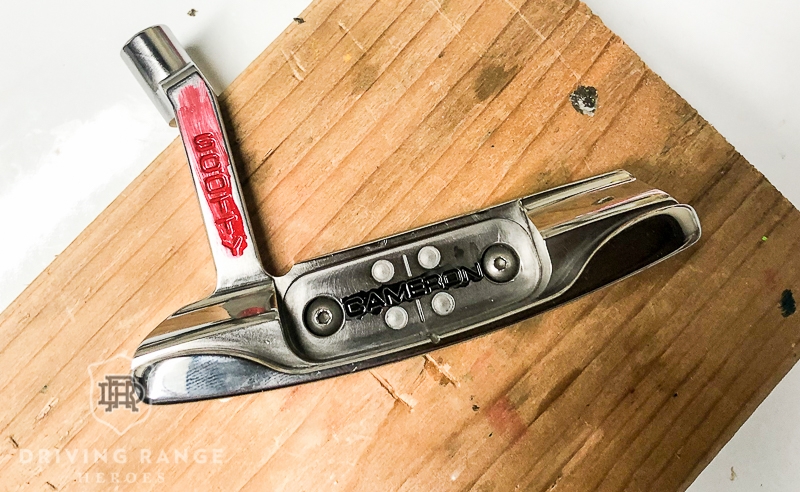
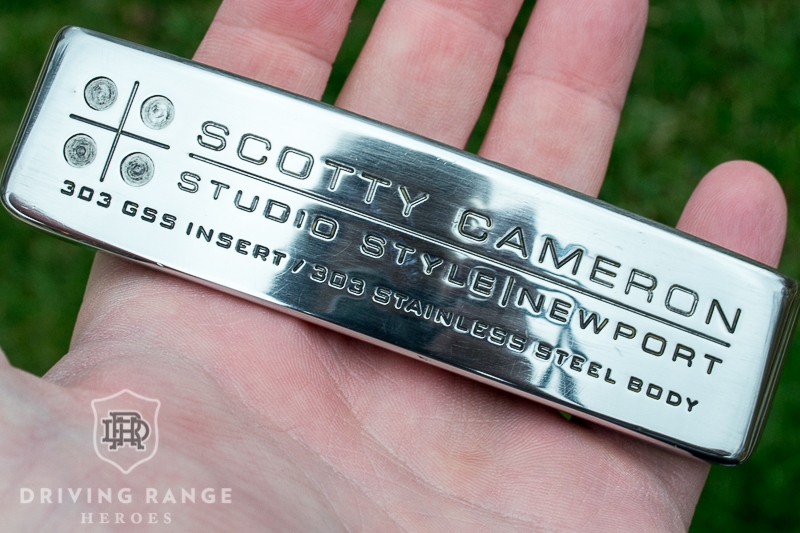
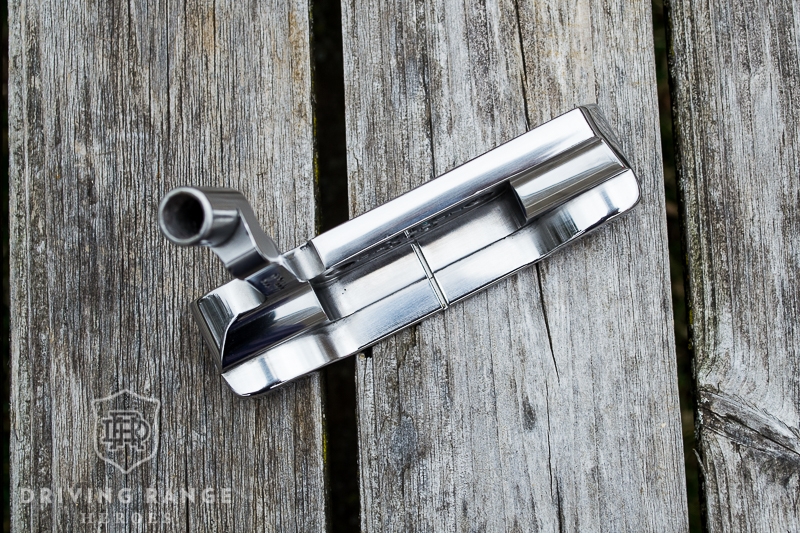
Thankfully there wasn’t a ton of damage to clean up. Just some light scratching and “clouding”. By clouding, I mean areas that were high buff now looked kind of smudged. I addressed it by first sanding with 800 grit sandpaper and then wet sanded with 800 grit again. From there, I wet sanded up to 2000 grit to get a nice fine finish. Apologies for lack of sanding pictures, but you can get an idea from Part 1. The sanding process wasn’t that difficult, but I had to be diligent to make sure the sand lines were consistent and smooth.
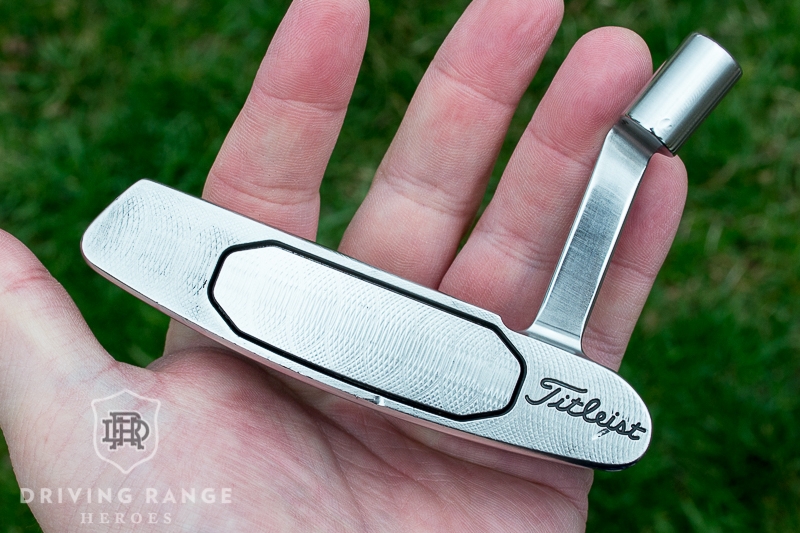
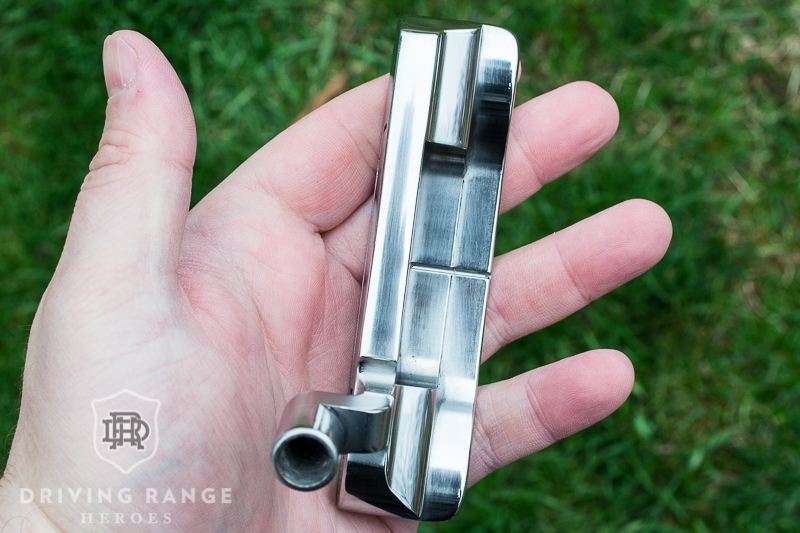
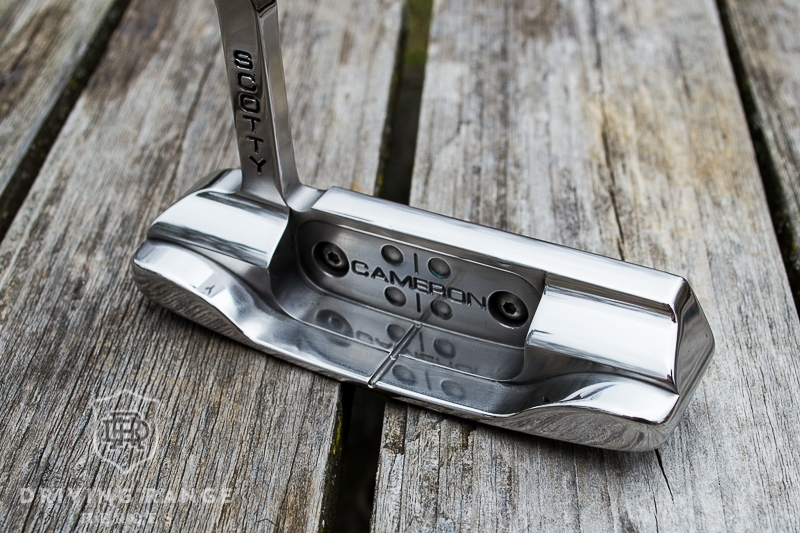
Lastly was the buffing/polishing process. I first did a light hand polish with some old Brasso to see what that would do. That didn’t have much of an effect so I moved onto the buffing wheel with green compound. This left me with a good polish, but it wasn’t as clean as I wanted. I used a polishing wheel bit on a Dremel to clean it up before doing two rounds of Brasso polishing using the Dremel. The putter came out looking great and it was time to wrap this up. I also gave the face a light polish to give it a little more flash.
Finishing Touches
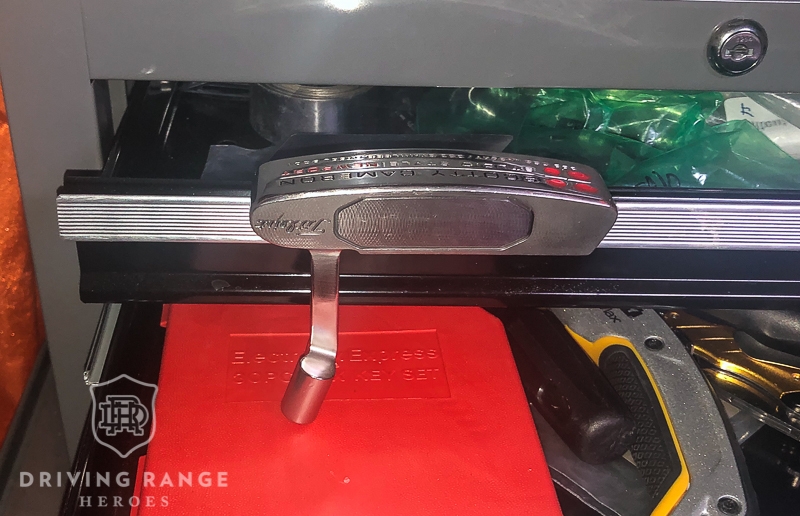
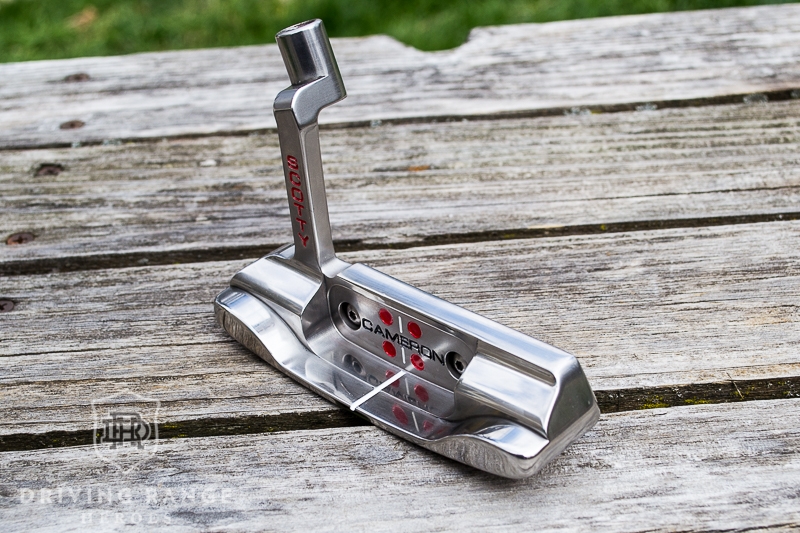
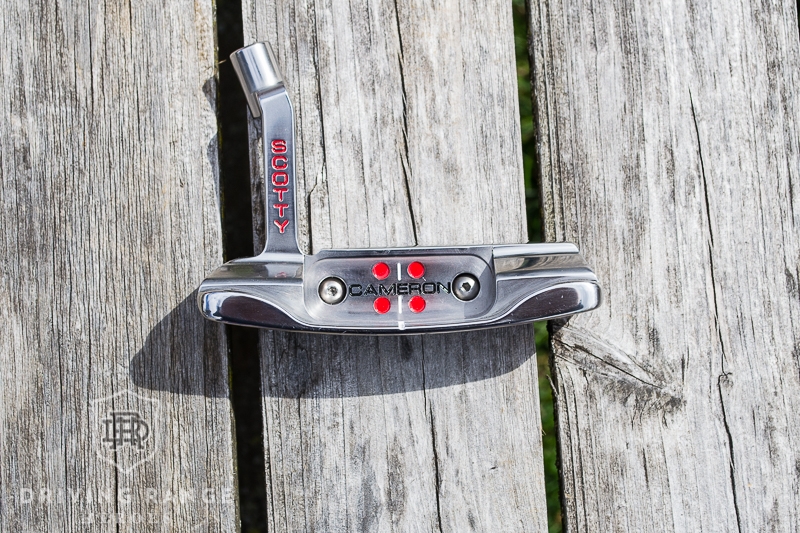
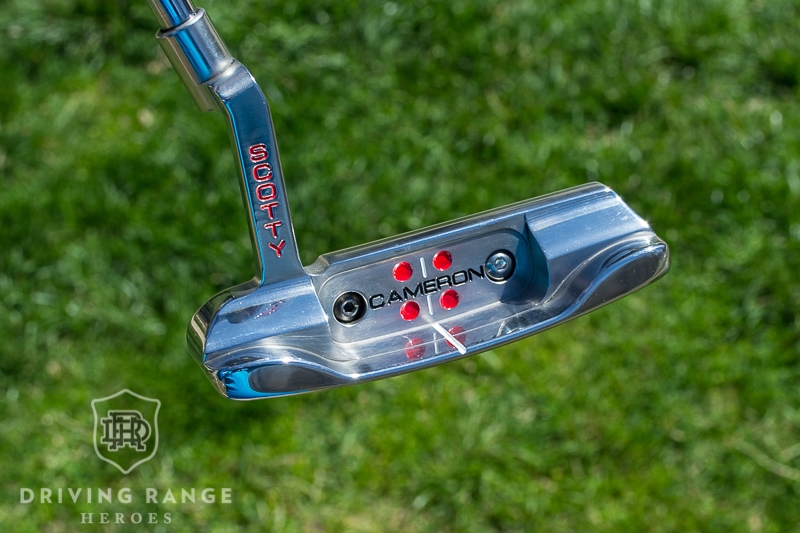
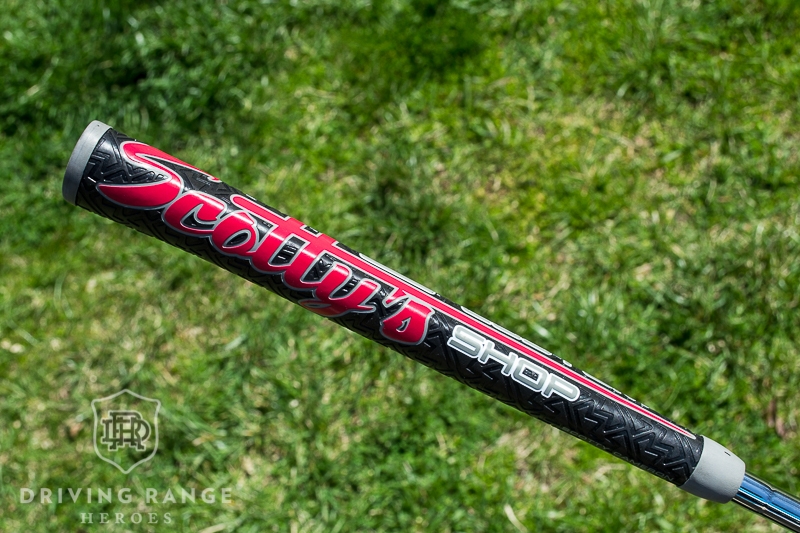
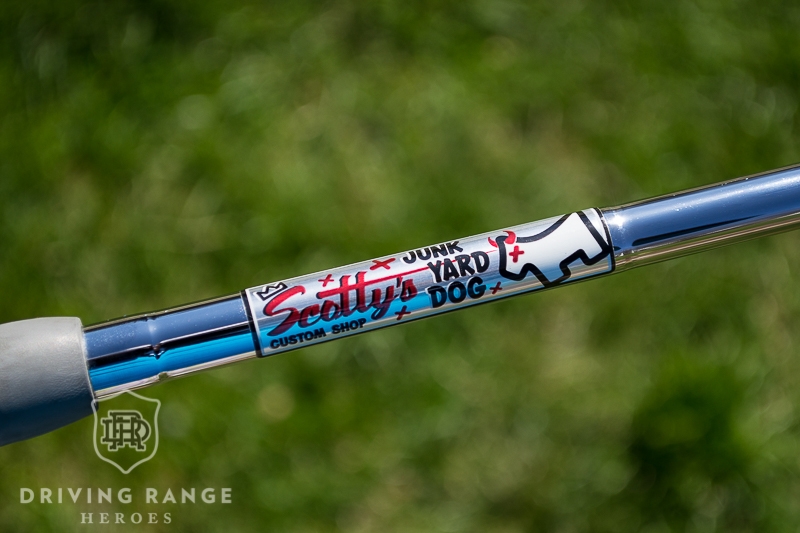
One of the things I really wanted to do was get the original shaft back on this putter. As mentioned in the previous parts, I had a Scotty Cameron Custom Shop grip and shaft band to match the color scheme. Given the effort I went to to get those items, I know I likely just pulled the whole shaft and stashed it somewhere. The problem was, I couldn’t find it… After digging around in all the old boxes full of shafts, assorted bags, and constructed putters, it was still missing. Finally, one early morning I thought of a potential spot in the garage. I walked out there at 6:30am, dug through an old bag, and sure enough, there it was. All it needed was some warm water and dish soap and it was good as new.

With everything gathered up, all I needed to do was paintfill. BIG problem. Pretty much all of my usual paint was dried up and unusable. Given the current pandemic, anywhere I’d buy this paint was closed as a non-essential business. Thankfully I had some Testors enamel paint MARKERS in the right colors. I ended up ordering a pack of six markers as well. This made painting more difficult and time consuming, but got the job done in the end. Paint cleanup was also more difficult, but patience and perseverance got the job done.
Quick shout out to my rig for drying paint on the sole of the club so it would settle flat. It was like my tool box was custom made this. Perfect height to lock into the bumpers and shoulders of the putter.
Is That Spry Evo’s Music?!
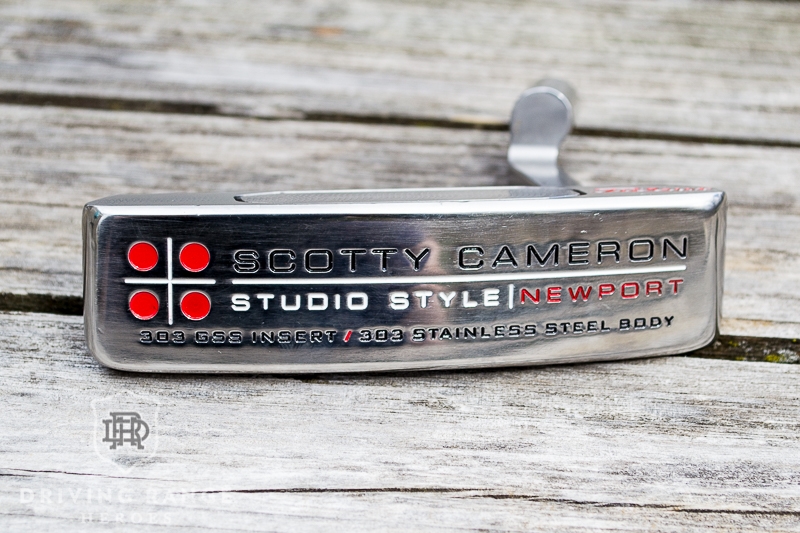
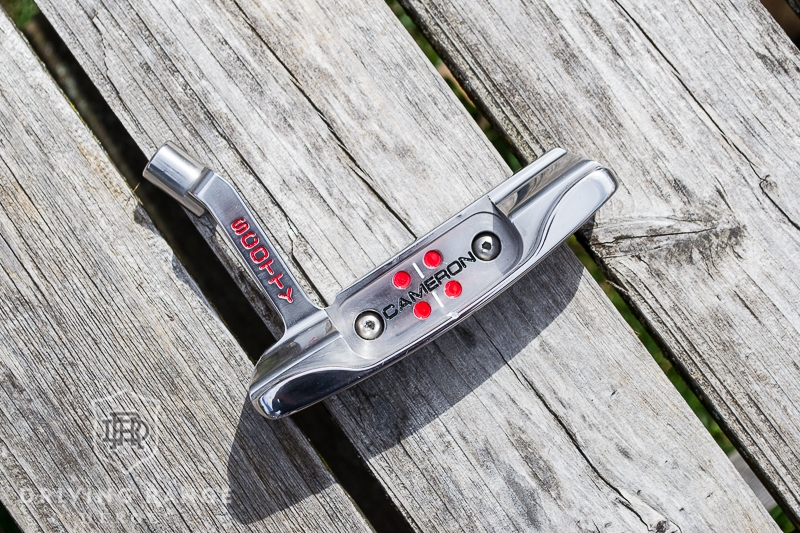
The last step in the process before final construction was to put new “elastomer” around the insert. Elastomer is a fancy word for “white bathroom caulk”. With all of the acetone baths to remove paint, the caulk took a beating so it needed to be replaced – which was expected.
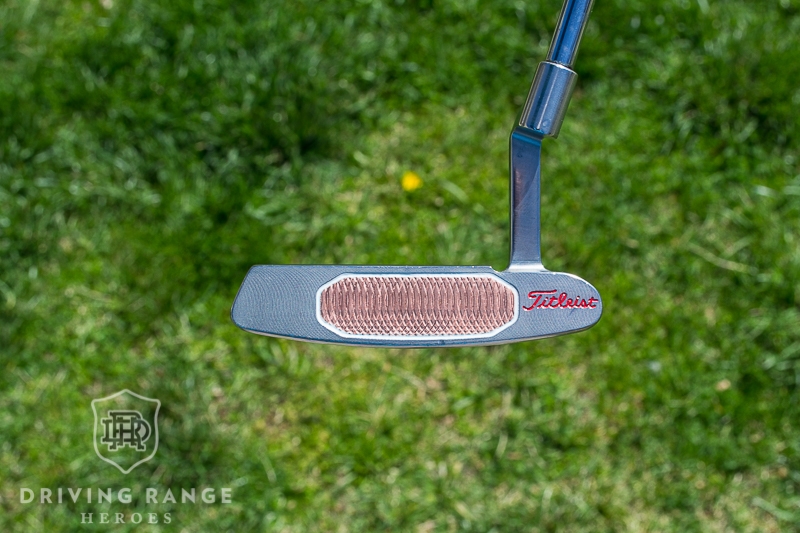
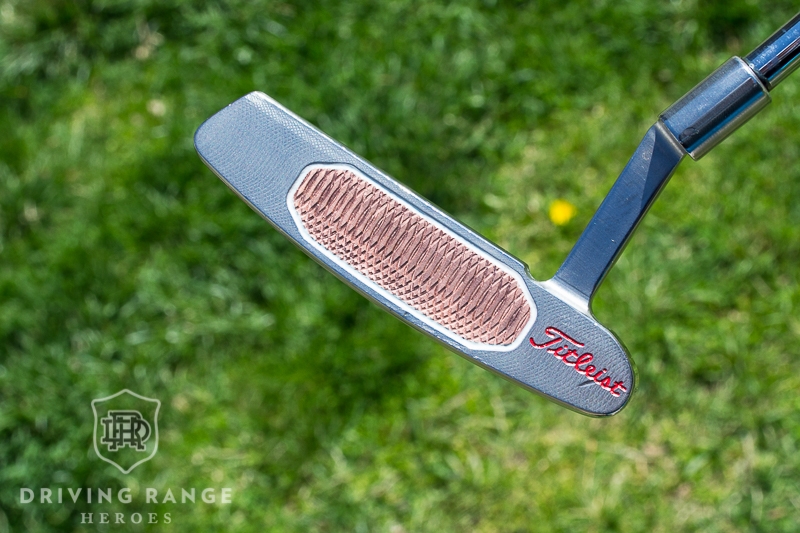
When I first posted a picture on Instagram of this putter being worked on, an old friend reached out. It was none other than Charles from Spry Evo dropping from the clouds! Spry Evo makes aftermarket replacement inserts for a wide range of putters and I’ve used them many times before. In fact, many years ago, I had asked Charles if he could do a copper insert for this very putter, but at the time, he didn’t have a design for it. Fast forward almost seven years and Charles commented, “hey, looks like you could use a copper insert for that putter.” My first thought was that I didn’t want to because this project was to get back to an original state.
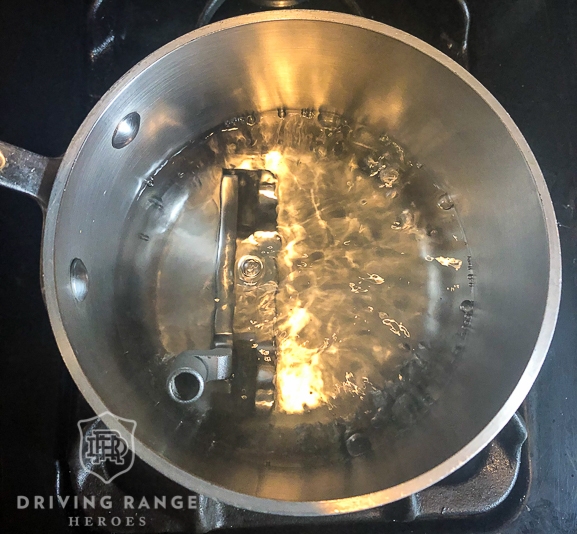
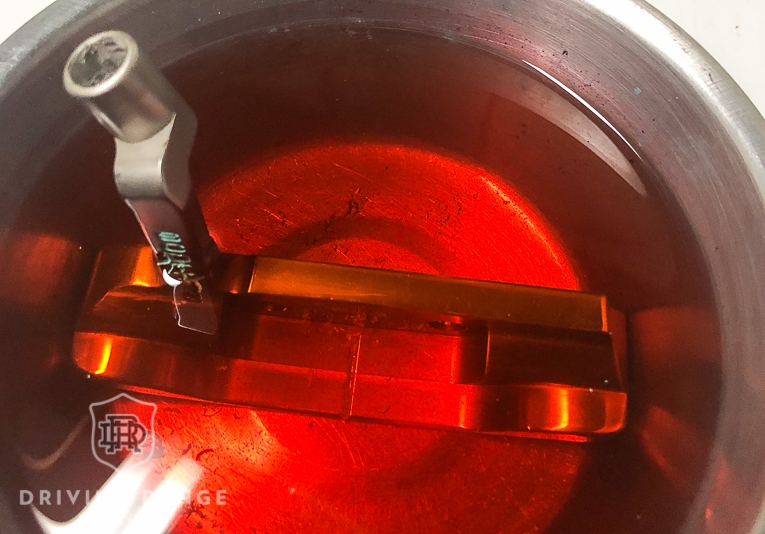
Then when I found myself eBaying Studio Style putters to put a copper insert in, I clearly knew what I had to do. I emailed Charles and said “let’s do it!” All he needed to know was if I wanted a smooth or milled finish and what color screws I wanted. Charles got it in the mail, and I dropped the head in some boiling water to remove the stock insert without damaging the paint. Turns out, I still had issues. The boiling water caused streaking in the metal and it wouldn’t come out on the topline. I had to polish the topline, slipped too far with the wheel, ruined some paint, and had to do a ton of repainting. I was furious, but I guess it comes with the territory.
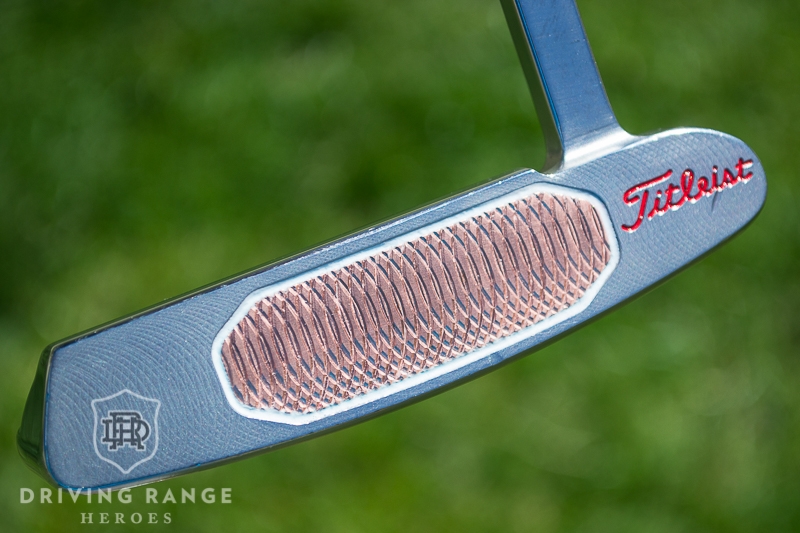
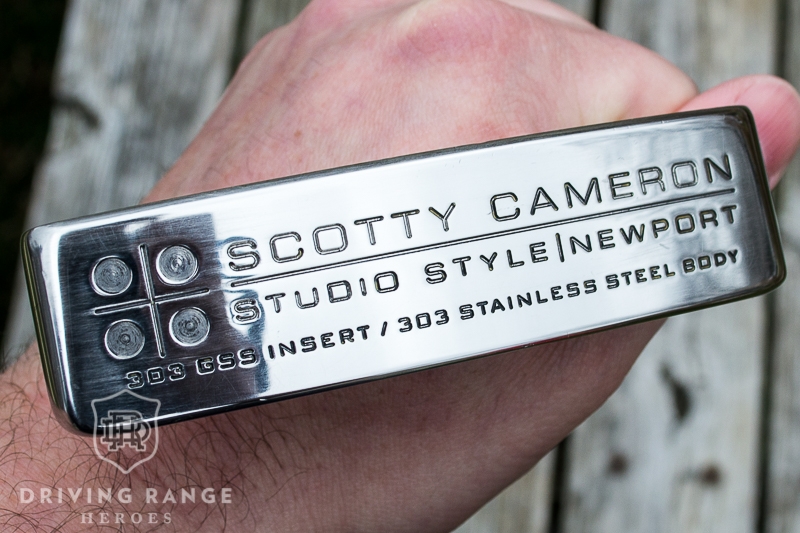
The copper insert adds a little weight and a little more click to the putter. Frankly, as much as I love the original Studio Style, this insert is a major upgrade.

Final Thoughts – Restoring a Scotty Cameron Studio Style Newport
While I started out with intent to bring my Scotty Cameron Studio Style Newport back to its original glory, I’m pretty pumped about where it ended up. It’s a killer combination of a classic Scotty Teryllium and a Studio Style. And let’s say I decide I’d rather have the original Studio Style insert back. It’s an easy enough swap and all I’ll have to do is redo the caulk…I mean elastomer. Regardless, I’m really happy with how the putter came out and I’m glad I got to do some new work with my buddy, Charles at Spry Evo! Now that this one is complete, I’m trying to figure out what to work on next.


Good story Bill. Very good read.
Bill,
Next time use a toothbrush and scrub out the paint fill in the small lettering. A mix of a toothbrush and some toothpicks should have the paint out in 15 minutes after your initial acetone bath.
If you like the high polished look you achieved then all good, but you can use a scotch brite scouring pad for a brushed satin look if you want to tone down the shine.
Thanks,
Mark
ThePutterDepot
Oh yeah, both are techniques I use. Toothbrush didn’t work here.
I cover the scotch pad use in another project post. I wanted to keep this one polished.
Hi Bill, Quick Question for you. When were are removing the face insert was there any glue of epoxy behind it? I am about to order the Copper smooth milled insert and Im curious if you had any epoxy behind the face. You also mentioned trouble with the topline while boiling it, do you think using a hair dryer or a heat gun would save you time and less hassle? Also any suggestions on what “white bathroom caulk” to use?
It’s not epoxy behind Scotty Cameron inserts. He uses a double stick tape of some sort. The boiling trouble was streaking which could have been from my pot being dirtier than I realized, my water not being filtered, etc. I probably could have used a different heat source, but in this case, I like boiling water because it’s pretty gentle on the club over long periods of exposure. If the club wasn’t a high polish, I wouldn’t have had any issue.
I don’t know what caulk I used. It was just a standard tube of white caulk I had laying around.
I just ordered a milled face from charles, when inserting the new one did you put a double sided tape on the placement?
No, I just put caulk in the pocket and screwed it in. The caulk will dry and hold the insert in alongside the screws. Takes a little tough as it will get messy.
Awesome! thanks for the articles and responses! I look forward to making my putter own customized putter!
Where do you get the screes from cant find them anywhere in UK
Great question, I’ve never actually had to hunt replacements down.
Where can I purchase a restored scotty carmon putter
Tough to say. eBay, golf forums, etc.
Where can I send my Scotty for restoration?
Scotty Cameron Custom Shop, BOS, Bastain, etc. Google putter restoration services and you’ll find a bunch more. Me personally, I’ve used BOS in the past and are the only ones I’d use in the future if I had to.
Bill- I’m getting ready to restore this exact same putter! Just two questions- please!
1) Curious what paint you used initially (before the pens). Some people say Testors Enamel, some say Tamiya Acrylic, with reasons for both. I’d like to match the original red, yellow, blue and green dots, but can’t find any info on those. I’m assuming they are a flat color (not gloss, clear/translucent, or metallic). Suggestions there?
2) When redoing the bathroom caulk (lol), did you put anything in to block insert screw I holes? I’ve heard that can be a pain if they get filled with caulk.
Thank you for your story and pictures!
I use testers enamel. I’m not sure what the original paint was, but it wasn’t matte, it was glossy.
As far as your second question, just be careful with how much caulk you use and understand how it will squish out. There’s not really an exact answer. You really only need it around the perimeter so you don’t have to put a ton in there.
Thank you Bill! I had one last question! I’m in the middle of refurbishing my studio style newport 1.5 as mentioned earlier, and I’m finished with the grinding, polishing, buffing, etc. I removed the insert as the acetone did a number on the elastomer as you know. It looks like there is some OEM double sided tape behind the insert. Did you find a good replacement for that, or did you not put anything back in there? I want to make sure the insert goes in evenly as it should. Many thanks, Bill!
Best,
Josh
I didn’t replace the tape. I just used a layer of caulk and pressed until it was flush. Took some touch and cleanup, but I was able to do it.